Monday, March 3, 2025

Started "My Sister" Wallhangings

 Hi all -

Boy has the weather been beautiful this past week! It's been warm with bright blue skies that can't be beat! But we get a reality check today. We're supposed to get 5-10 inches of snow starting this afternoon, with more snow coming later in the week. I'll miss the sun, but we always welcome the moisture!

I was cleaning out a cupboard last week and found some wallhanging patterns and kits that I had forgotten about. There are several from Sharon Schamber that I'm excited to work on and another by Frieda Anderson that will be fun. But I decided that I needed to make the My Sister kit designed by Bloomin' Minds. I had picked this up years ago to make for one of my sisters, then put it away and forgot about it. But I think that serendipity was at work because this wallhanging is more perfect now than it ever was. I decided to make one for each of my sisters. Here is my progress on the one using the fabrics in the kit:

My Sister - Kit Version


With the movie "Wicked "out now, this seems like the perfect gift! We grew up watching "The Wizard of Oz" together every year on TV and, after moving around our entire childhood, our family ended up landing in Kansas so it really fits us! For this version, I still need to quilt the green area and the outer border and add the binding and hanging sleeve. Here is the version using fabrics from my stash:

My Sister - Stash Version

This version just needs quilting in the green area and a hanging sleeve. Since I just needed to do some simple embroidery and some fusible applique, these have been pretty quick to make. The most tedious part was stitching the double blanket stitch around the applique pieces:

My Sister - Blanket Stitching

I used a double blanket stitch because I feel like it is the most secure way to stitch down fusible applique, except satin stitch which I've never been able to do nicely. I like the double blanket stitch better than the regular blanket stitch because it builds up more thread around the edge of the applique, which I think protects the edges of the applique from fraying better. I used So Fine thread, a thinner thread, because I have lots of colors and it's a bit thinner than some of my other threads so the build up isn't too thick. I'll let my sisters decide who gets which version of the wallhanging. I personally like the green fabric and the fabric used for the shoes better in my stash version and like the purple fabric and the outer border fabric better in the kit version. It'll be interesting to see what my sisters think!

I also spent some time this week working on my La Passacaglia EPP quilt designed by Willyne Hammerstein. I finished the first rosette that I was working on last week:

La Passacaglia - Rosette 1

I pulled out the papers from the center and the black round since those are complete enclosed by the star round. I pressed the rosette, making sure that the seam allowances go in the desired directions and that everything is clean and flat. It really looks and feels wonderful!

La Passacaglia - Rosette 1 Back


I also steam press the papers after I take them out to flatten out any folding from when I was doing the stitching and to close up the holes from the thread basting a bit. I think this makes the papers easier to reuse if I need them. There should be enough papers in the kit to not have to reuse any, but you never know when you'll lose one or if I might want to make just a part of the quilt for some other purpose some time in the future.

I also did a little more work on my Flower Pincushion designed by Sue Spargo:

Flower Pincushion

I just keep plugging along on this one!

I also made some progress on my Desert Blossom Blanket designed by Rohn Strong:

Desert Blossom Blanket

This one has been a little bit frustrating because, like my previous crochet blanket from the same designer, there are errors in the pattern. I wasn't sure how to handle one of the errors so I contacted the designer and he replied with the answer almost immediately. He seems to be a really nice guy and I appreciate his quick help, but I probably won't make any more of his patterns unless they are really incredible because I'm anal about patterns being correct. I get really frustrated when I have to reverse engineer the instructions.

Finally, this isn't anything that I've actually done, but a friend and I are doing a BOM with our local quilt shop. We had to sign up and start paying last fall, but didn't get the instructions until this month.

Jungle Magnolia - Instructions


 The quilt shop did it this way because this is a very expensive quilt kit so the individual payments aren't as onerous spread out over the extra months. And the sewing is divided into just 6 months so we're paying like a regular full year BOM. The pattern is Jungle Magnolia designed by Quiltworx. The pattern is very thick and heavy! Each section of the pattern shows the quilt in a different colorway and the instructions include the fabric requirements for each one. The BOM includes video classes and zoom sessions for help with the pattern, which will be recorded so we can watch them any time. This is my first Quiltworx quilt, so the extra help will be much appreciated! Now we just have to wait until the end of March (shipping is on the 25th of each month) so we can start the sewing....

Nancy


Monday, February 24, 2025

Finished Summer Blossom Mandala Blanket

 Hi all -

It looks like the country is warming up this week. I'm certainly loving the beautiful sunshine and the longer days! Spring really is on the way!

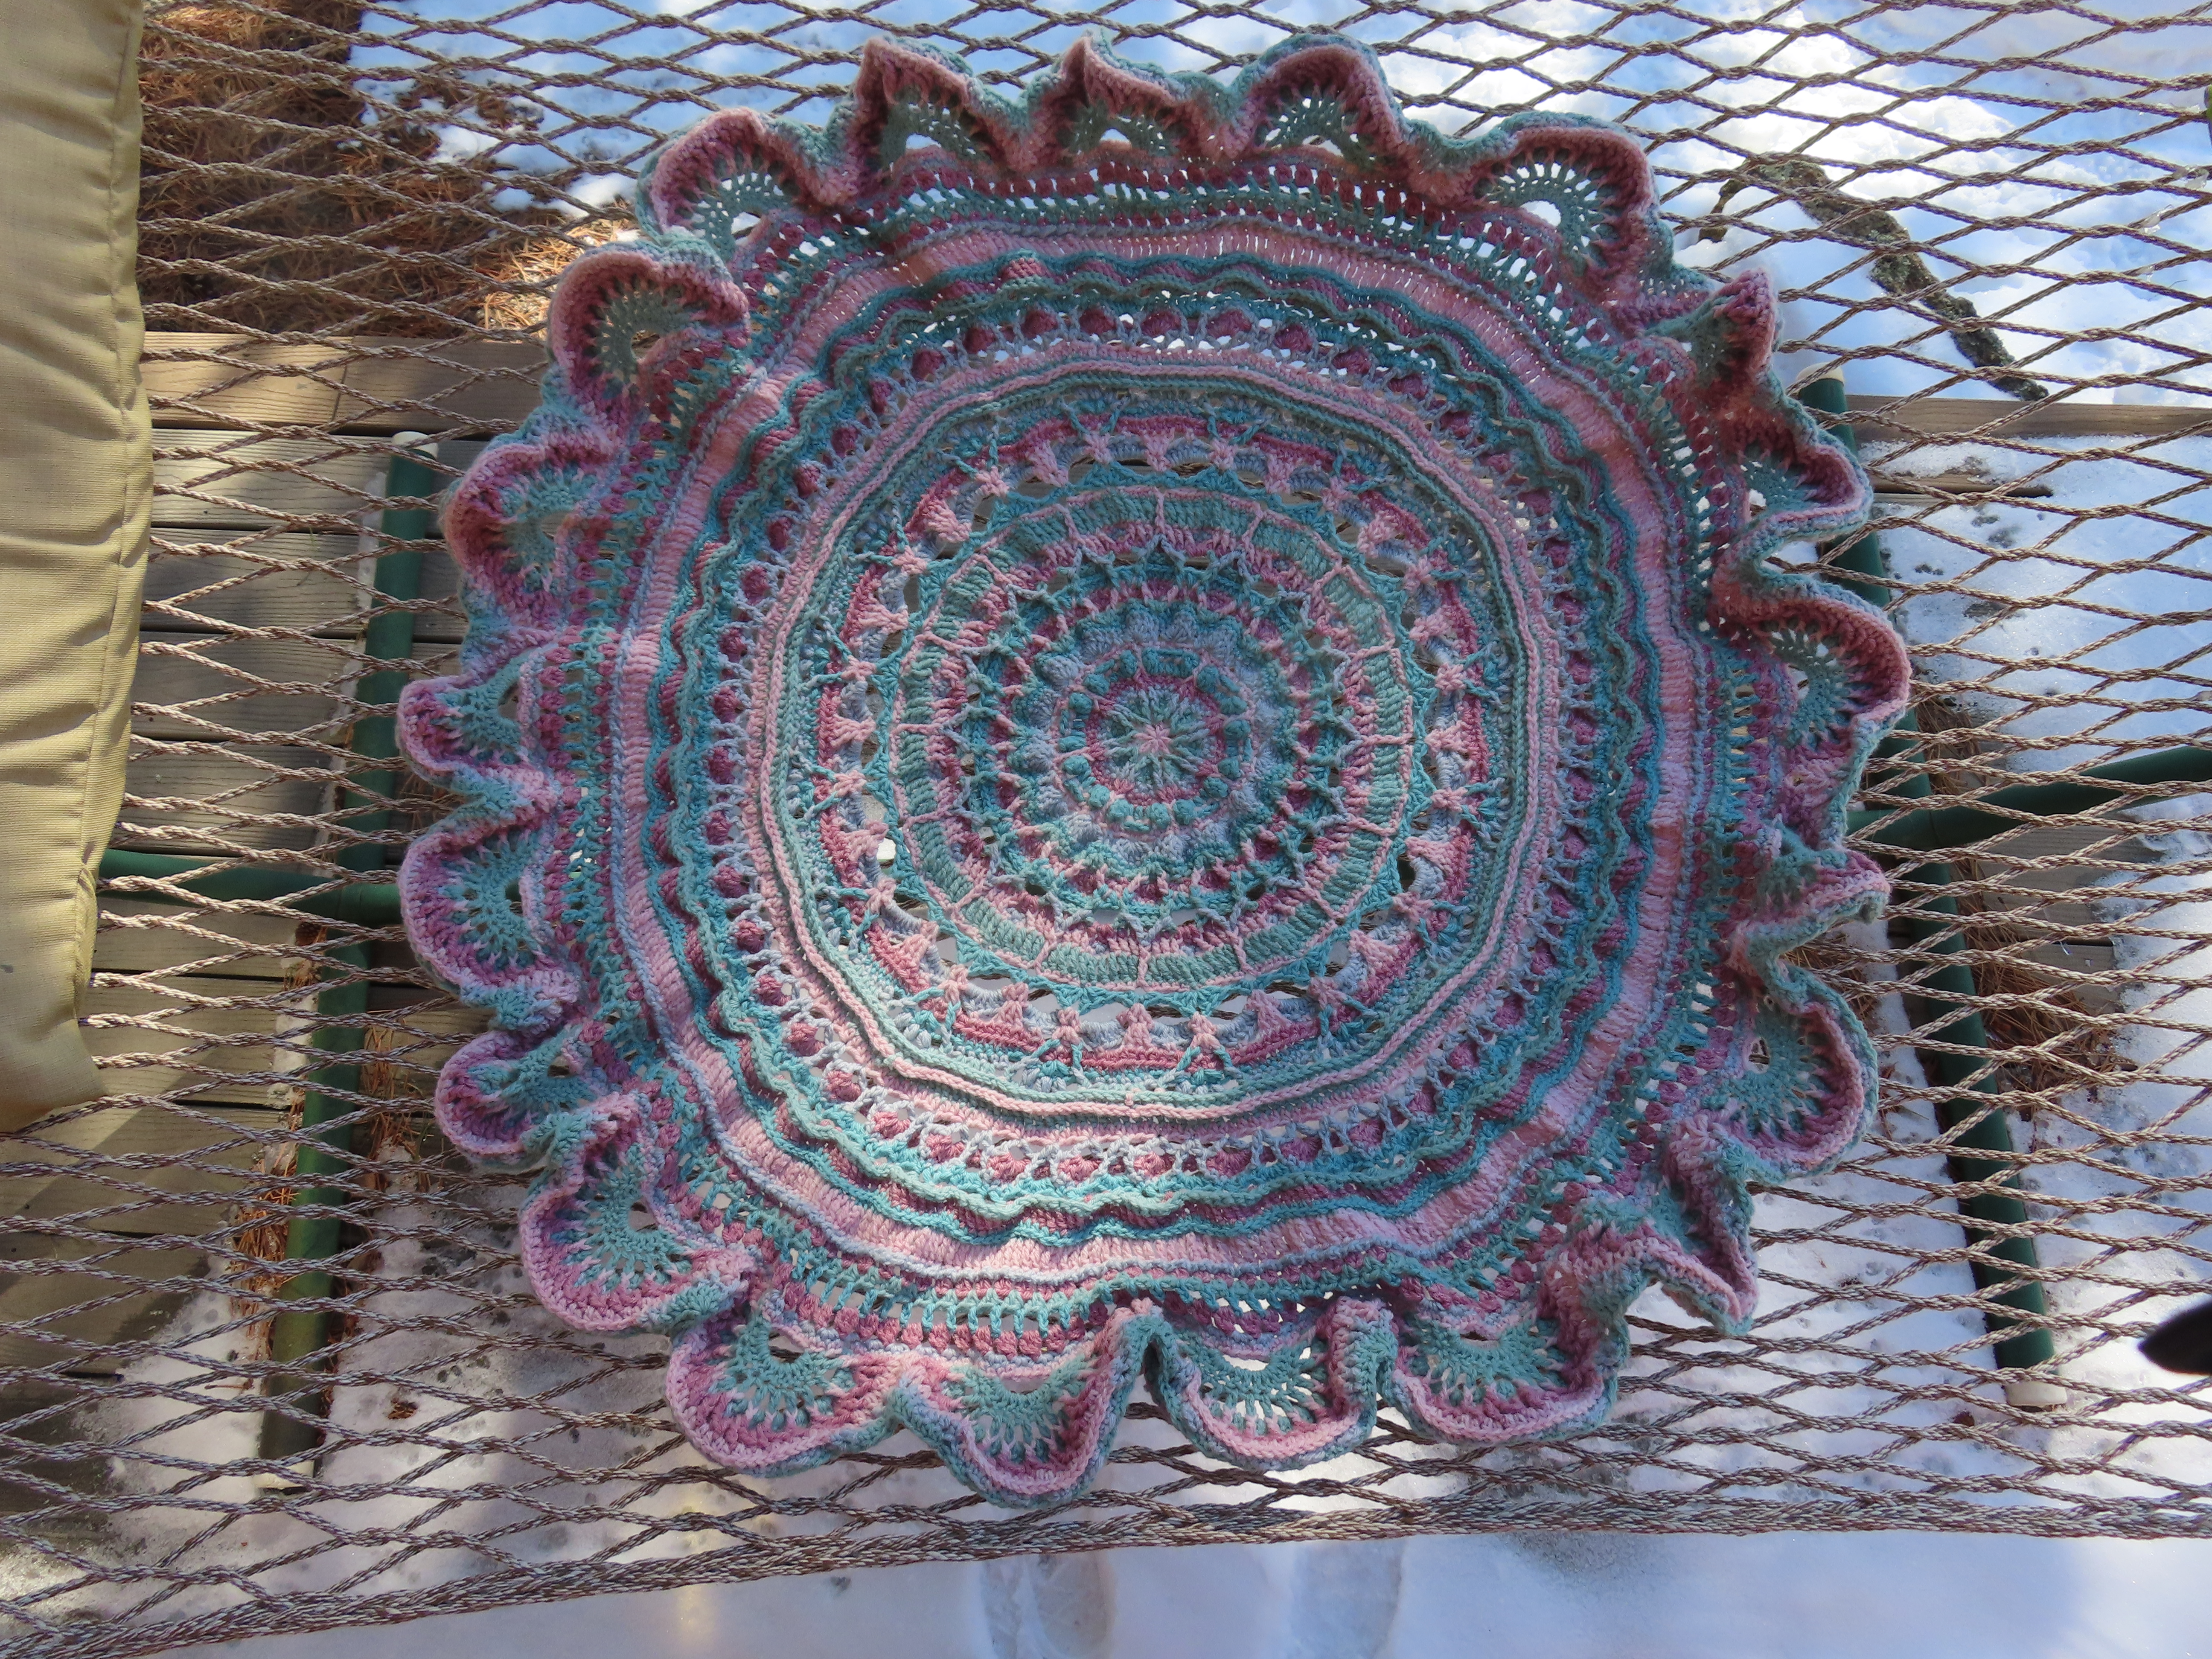
This week I concentrated on finishing my Summer Blossom Mandala blanket designed by Rohn Strong:

Summer Blossom Mandala

It looks small, but it ends up being the perfect size for a throw when I use it on the couch. And when I wash it, I'll lay it out flat to dry and that will make it a bit larger. This blanket is a bit ornate for my esthetic, but it's a wonderful way for me to get better at crocheting and it's not boring to make. Here are some close-ups of the details:

Summer Blossom Mandala - Center Detail

Summer Blossom Mandala - Mid-Blanket Detail

Summer Blossom Mandala - Edge Detail

The yarn used for this blanket is an acrylic/wool blend that is really soft and seems like it will be warm. It was also really easy to work with.

Since I finished my Summer Blossom Mandala, I decided to start another fancy crochet blanket that I had in my queue. This one is the Desert Blossom Blanket, also designed by Rohn Strong:

Desert Blossom Blanket

This one uses a different yarn that is 100% acrylic. The yarn is fuzzy and soft and I think it will make a really nice blanket. So far it's been a bit difficult to work with because it seems to have more trouble with static. As I crochet, the static pulls the old ends that are hanging down to become tangled with the yarn I am crocheting with. But that's becoming easier as the piece gets bigger because the ends are getting further apart. And I like to pull the yarn from the center of the skein so I'm probably getting less static as the yarn in the skein center gets looser.

Finally, I've made some progress on my La Passacaglia quilt designed by Willyne Hammerstein. I've almost finished the outside ring of the first rosette:

La Passacaglia - Rosette 1 Outside Ring

I really like how the first rosette is looking:

La Passacaglia - Rosette 1

This is just the first rosette in a large quilt, but I really like how the colors are looking! There are several rosettes like this one throughout the quilt. My plan is to have several of the black rings scattered through the quilt to draw the attention across the quilt. There are also multiple rings of stars. I plan to use different solids for the star points in each of the rings. I think this will add some cohesion to a very busy quilt. And all of the fabrics will be from Tula Pink, so there will be variety but all of the colors will go together. I'm pretty excited about this quilt and hope to put more time into it, but I also have so many different projects that I'm excited about that I don't know if I'll achieve that. We'll see how it goes!

Nancy


Monday, February 17, 2025

Binding Finished on A Newspaper

 Hi all -

It's definitely winter this week! We've had snow off and on for the last couple of days and it's been snowing all day today. We're not expecting a big dump, but we're expecting some snow for the rest of the week so it could add up to some good moisture!

I spent most of last week putting the binding on my A Newspaper quilt. I expected it to be a challenge, but I didn't expect it to take a whole week! The sharp inner points were a challenge, but the biggest problem was the thread I used. Even with relaxing the thread by running my nail down it and adding Thread Magic, I as fighting tangles and knots all week! Of course, a smart quilting would just change to a different thread, but I'm very head strong and was determined to keep with my initial choice. I did finally get through it and the binding is now finished:

A Newspaper

A Newspaper - Back

The inner points aren't perfect, but I think they look pretty good:

A Newspaper - Front Close-up

A Newspaper - Back Close-Up

Another contributing difficulty to putting on the binding was that both the binding and the border are high quality batik fabrics. They're beautiful fabrics, but are a bit difficult to get the needle through. I used a thinner needle to make that a bit easier, but that's also harder on my hand. I've never learned to use a thimble so the needle tends to poke through the skin on my middle finger when pushing the needle through the fabric. I recently heard about Thimble Tape as an alternative to using a thimble. You are supposed to cut off about six inches of the tape and wrap it around your finger to form a thimble. That sounded perfect to me so I gave it a try. It didn't work for me at all! The tape is a gauze tape like what you might use to wrap a wound. The threads in the gauze are far apart and I found that the needle just poked through the holes between the threads of the gauze and did nothing to protect my finger. I was using a pretty small needle, but I can't imagine this tape would help with any size needle. I've got lots of the tape so I'll try it again sometime, but I'm not hopeful for this purchase. As far as A Newspaper is concerned, I now need to finish the quilting. It shouldn't take too long to finish, but I'll probably put it aside for a little while to work on some other things before going back to it. I jsut need to have it finished by the April meeting for my quilt guild so I can include it in the "new-to-me technique" challenge.

I also did some work on Spicy Chips (my potato chip quilt). I had the top finished last week, so this week I worked on the backing and the binding:

Spicy Chips - Top, Backing and Binding Finished

I wanted to get the binding and backing finished now so I could integrate the left over fabric back into my stash. I did the binding first so that I could get the longest pieced possible. This quilt was made from two half-yard sets of fabric, two colorways from a fabric collection. I had cut a bunch of "bricks" from all of the fabrics that I randomly pulled for making the blocks. So all of my fabrics, after cutting the bricks, were around 20"-30" wide. So I cut the binding strips from what was left, using the remaining fabric to piece the backing. I made the binding extra long because there are a lot of seams in the binding. When I put binding on a quilt, if I get to a corner and have a seam in the binding, I'll cut the binding to move the seam away from the corner. I wanted to make sure that I had plenty of binding for that. Finally, I wanted to make sure that I used up all of my leftover bricks in the backing so I started by sewing all of the bricks into strips and then added larger pieces of the leftover fabric:

Spicy Chips - Backing

The backing is a bit chaotic, but it'll work and now I can integrate the remaining fabric back into my stash. I'm not sure when I'll quilt this quilt, so I went ahead and stay stitched around the perimeter of the backing. I don't usually stay stitch my backings, but this one has a lot of seams and the stay stitching really does tame and protect the edges. And it really doesn't take very long to stay stitch around the perimeter of a quilt because it doesn't need to be precise so you can sew at the top speed of your sewing machine, which is kind of fun to do!

I also did a small amount of embroidery on my Flower Pincushion designed by Sue Spargo:

Flower Pincushion

It's not much, but it's amazing how quickly these projects get finished up with just a little plugging away! I thought I would share the bag I keep this project in since I like it so much! It's a "cosmetic travel tote" from Laurel Burch. I don't use any cosmetic, but this tote is perfect for small embroidery projects!

Laurel Burch Tote - Inside

Laurel Burch Tote - Outside

The tote is fairly small, but everything fits easily inside. I have the felt, pattern and all of the thread. I also have my general supplies -- needle roll, Sue Spargo book, scissors, needle threader, air-erasable marking pen, pins, reading glasses, etc. It's perfect for a project on the go! I have several of these totes and highly recommend them.

Finally, I finished a few more scallops on my Summer Blossom Mandala designed by Rohn Strong.

Summer Blossom Mandala

The scallops are fairly quick to crochet, but there are five color changes in each scallop so ten ends to weave in on each. But I'm now halfway done with the scallops, so the end is in sight. After the scallops are added, there will be a couple more rounds around the entire blanket and it will be finished!

Nancy


Monday, February 10, 2025

Dog Park Piecing Done

 Hi all -

I hope everyone is doing well! We had been enjoying some beautiful mild weather, but it looks like winter has set back in. We're going to have cold temperatures all week with some bouts of snow. It's hard to move back into winter, but we do need any moisture we can get, so it's okay. And it does make it easier to stay inside and work on. my projects!

I was able to get the tennis ball top and bottom borders put on. my Dog Park quilt designed by Elizabeth Hartman:

Dog Park

I really like how this is turning out! As I've mentioned before, I'm thinking about adding applique flowers to this quilt. But, as usual, I'm moving on to a few other things while I contemplate this.

I was also able to finish piecing my potato chip quilt:

Potato Chip Quilt

I love how bright and happy this quilt is! I'm thinking about calling it "Spicy Chips" or "Nachos". It's really interesting how much better the layout shows up in the pictures than it does in person. I'll try to use the quilting to enhance the pattern in person.

I've also picked up an old project to work on. I don't remember when I started this, but it was a long time ago. One of my guilds is having a "new to me technique" challenge. I've never done a scalloped border before and I had been planning to put one on this quilt, so this is the perfect project for this challenge. And it will be a good challenge because I put it aside because I was a bit intimidated because I knew that I made the inside points on the edge pretty sharp so it's going to be a more difficult scalloped binding to make. I'm calling this quilt "A Newspaper" from my favorite joke as a kid -- What's black and white and red all over?

A Newspaper

When I had put this project aside, I had the stars in the circles quilted in the border, but hadn't trimmed the border yet. So this weekend I watched a couple of YouTube videos on scalloped bindings and started working on it. First, I sewed around the quilt approximately 1/2" from the edge of the quilting. This was an easy way to get a cutting line for the quilt edge and also tames those edges while putting on the binding. I then trimmed just outside of the sewing line. I measured the distance around the corner and around a scallop and did some math to figure out how much binding I would need and made the bias binding. Luckily, I had a red batik in my stash that matches the quilt enough to use it for the binding. Then this morning I sewed the binding around the edge of the quilt:

A Newspaper - Binding Sewn on Front

A couple of the YouTube videos said you don't need to clip the point until after sewing on the binding, but I found that my points were too sharp to be able to sew them without clipping. Sewing the binding on was a bit fiddly, but I got it done and now I can hand stitch it to the back of the quilt. Then I'll have to do some more quilting to finish up this quilt.

I also started a new little hand project for working on away from home. I have plenty of small knitting projects I can take with me, but I use an app to store my knitting patterns and keep track of where I am and I've found that the battery on the iPad that I use runs out after an hour or two when not plugged in, so I have to be careful about how long I work on knitting projects away from home. So I decided to start another portable project that doesn't rely on electricity. (And, of course, I just wanted to start a new Sue Spargo project, so.....) So I started working on the Flower Pin Cushion designed by Sue Spargo:

Flower Pin Cushion

I really love working on these wool applique/embroidery projects! There's something soothing about the feel of the needle gliding through the wool. And I think they turn out beautiful!

Finally, during the Super Bowl I picked up my Summer Blossom Mandala blanket designed by Rohn Strong:

Summer Blossom Mandala

This was a nice relaxing project to work on while watching the Chiefs get trounced. I was rooting for the Chiefs, so it was nice to have something soft and warm on my lap to soothe me throughout the game! I was able to add four more scallops to the blanket while watching the game. I'd really like to get this blanket finished so I'll try to concentrate on it more when doing handwork at home, after I get the binding sewn to the back of A Newspaper.

I think that covers it for this week....

Nancy


Monday, February 3, 2025

Wadsworth, Buttercup, Jeff and Clover

 Hi all -

I hope everyone is doing well! February is certainly starting out mild up here! It's currently 51F at my house. Unbelievable! But it's supposed to cool down and snow starting Wednesday afternoon. The timing is perfect for me because I have plans to take a friend out to lunch for her 70th birthday on Wednesday so we'll just beat the snow!

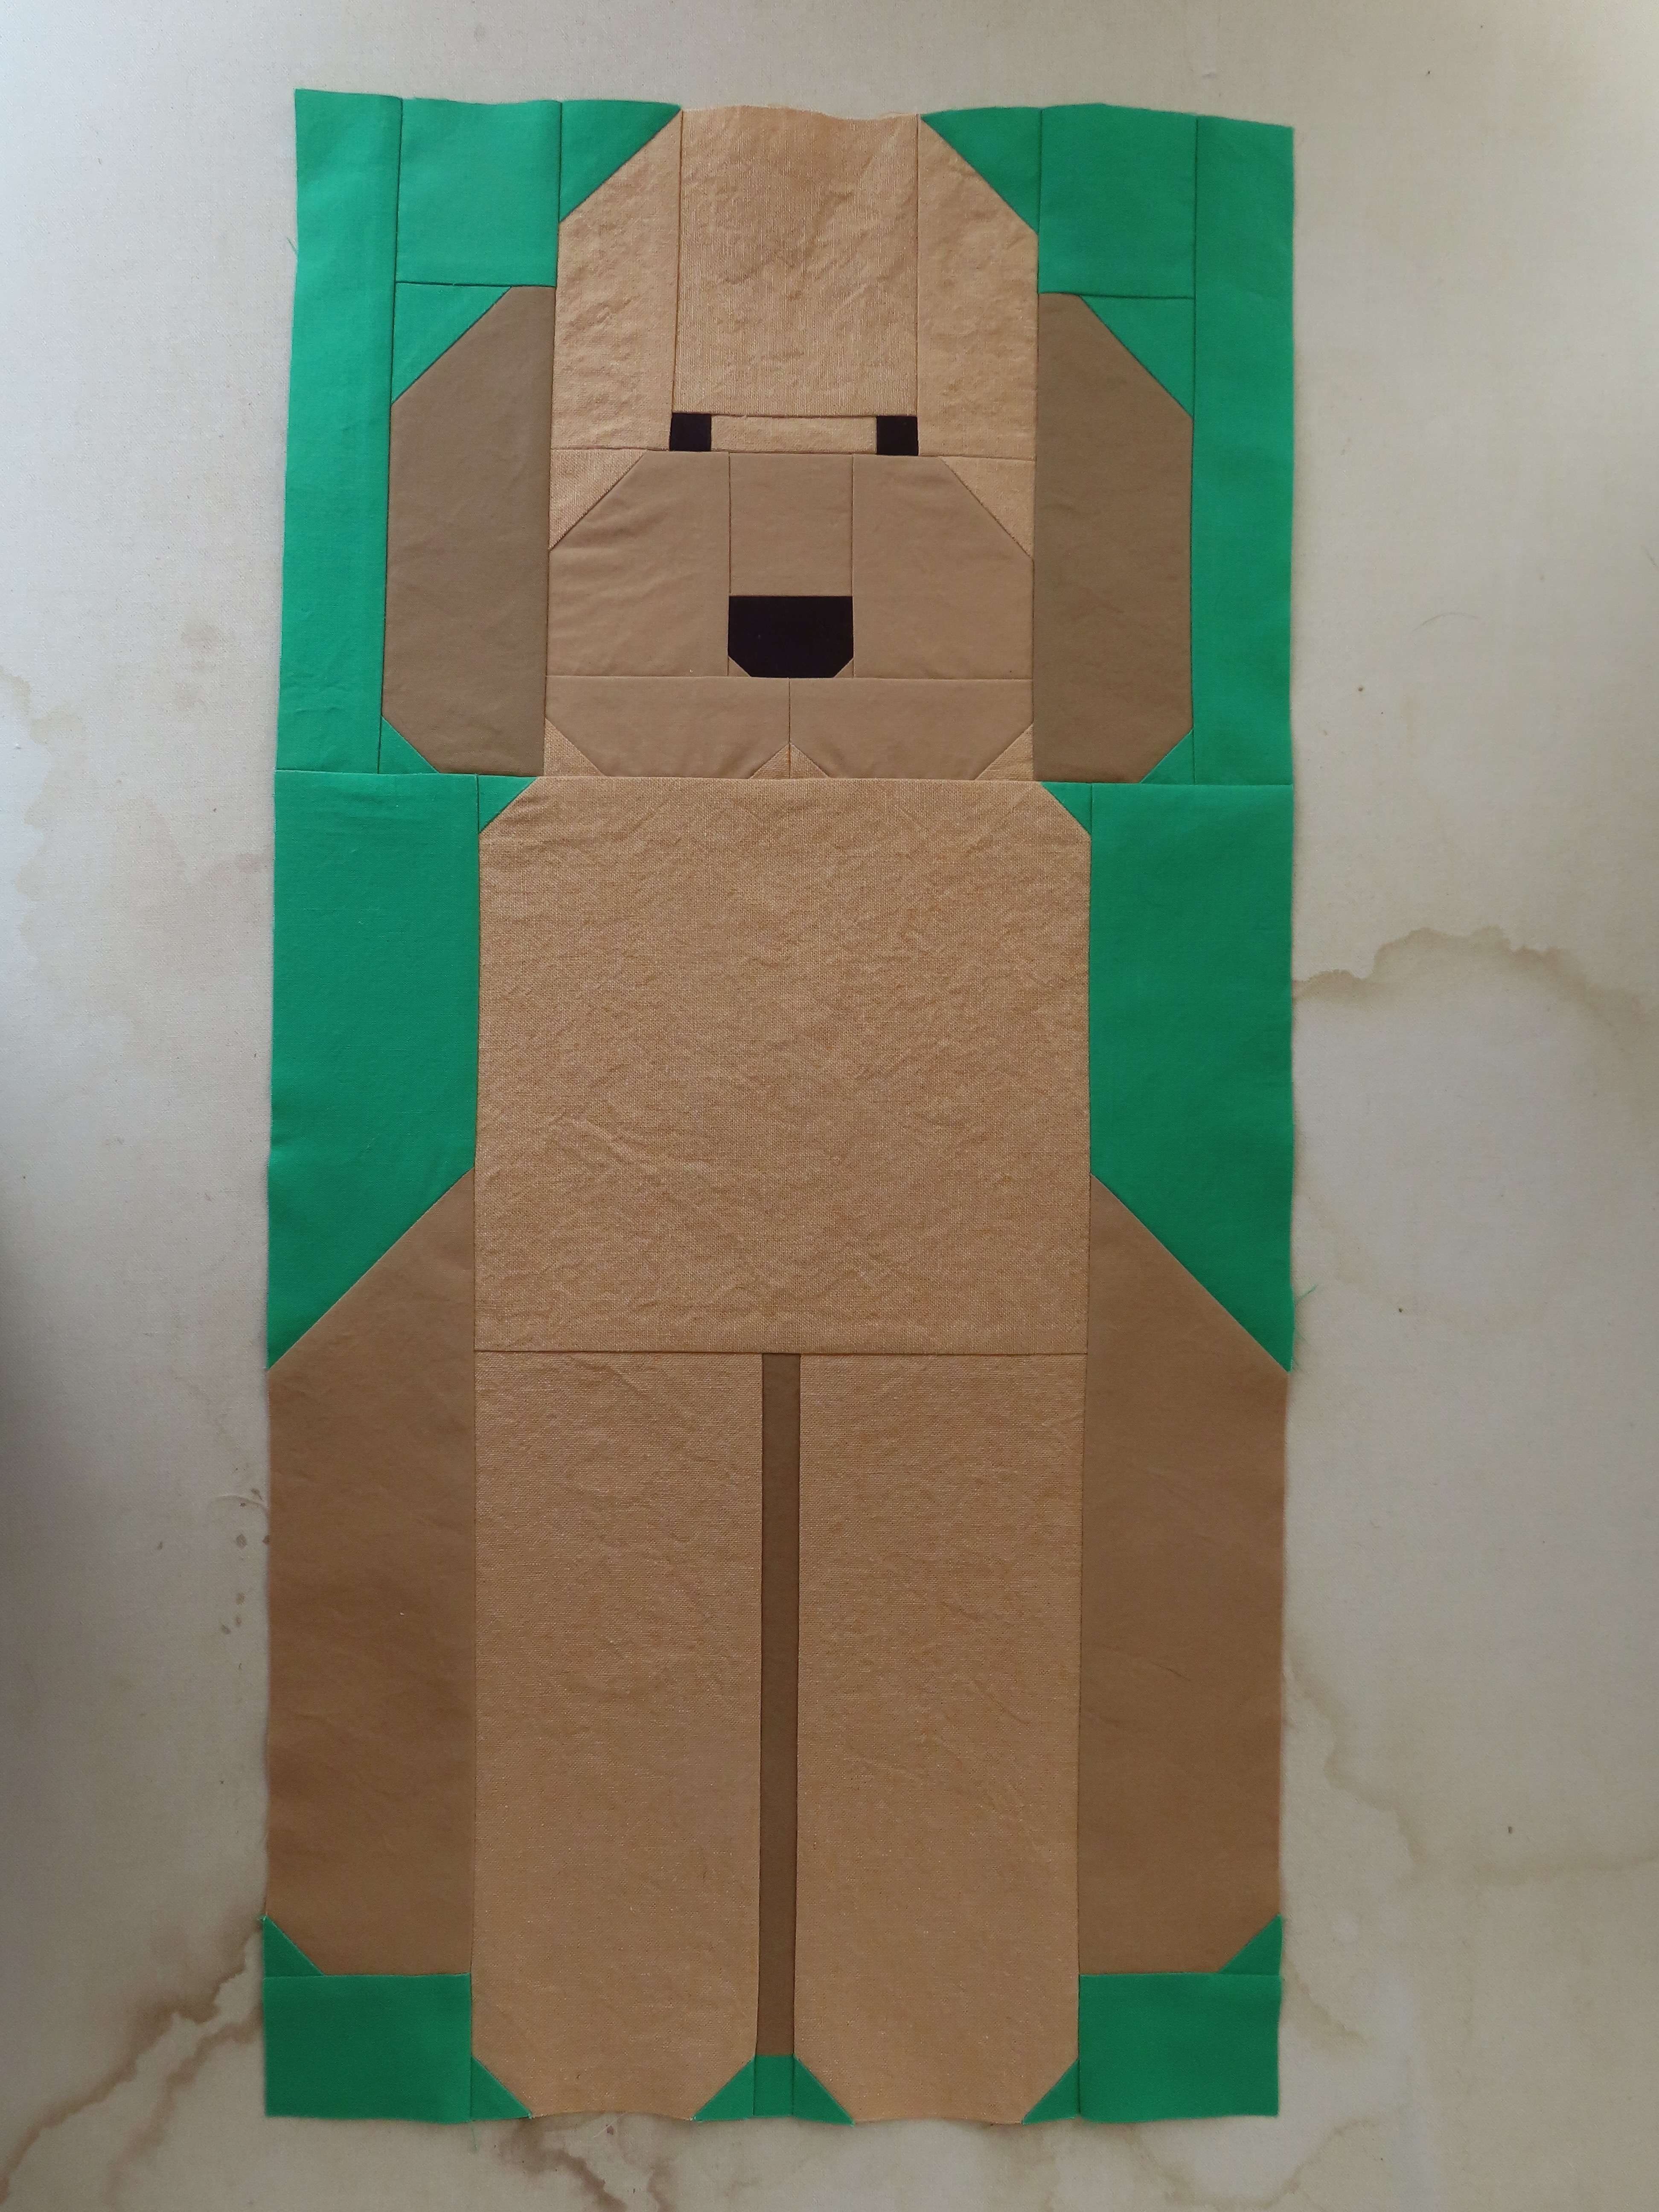
I've made some great progress on my Dog Park quilt designed by Elizabeth Hartman. I finished the individual dog blocks:

Dog Park - Wadsworth Block

Dog Park - Buttercup Block

Dog Park - Jeff Blocks

Dog Park - Clover Blocks

I also fixed the ear units on my Pickles block. The two ear units were almost identical and I accidentally swapped them, so I took the ear units out of the block and put them back in the correct places:

Dog Park - Original Pickles Block

Dog Park - Fixed Pickles Block

It's subtle, but the ear shape is definitely better on the fixed block! And it really didn't take long to do. I'm proud of myself since I'm usually too lazy to fix something like this! If it was for me, I probably would have left it, but this quilt is for my sister so it was worth the extra effort. I was also able to get all of the dog blocks sewn together to make the body of the quilt.

Dog Park - Body of Quilt

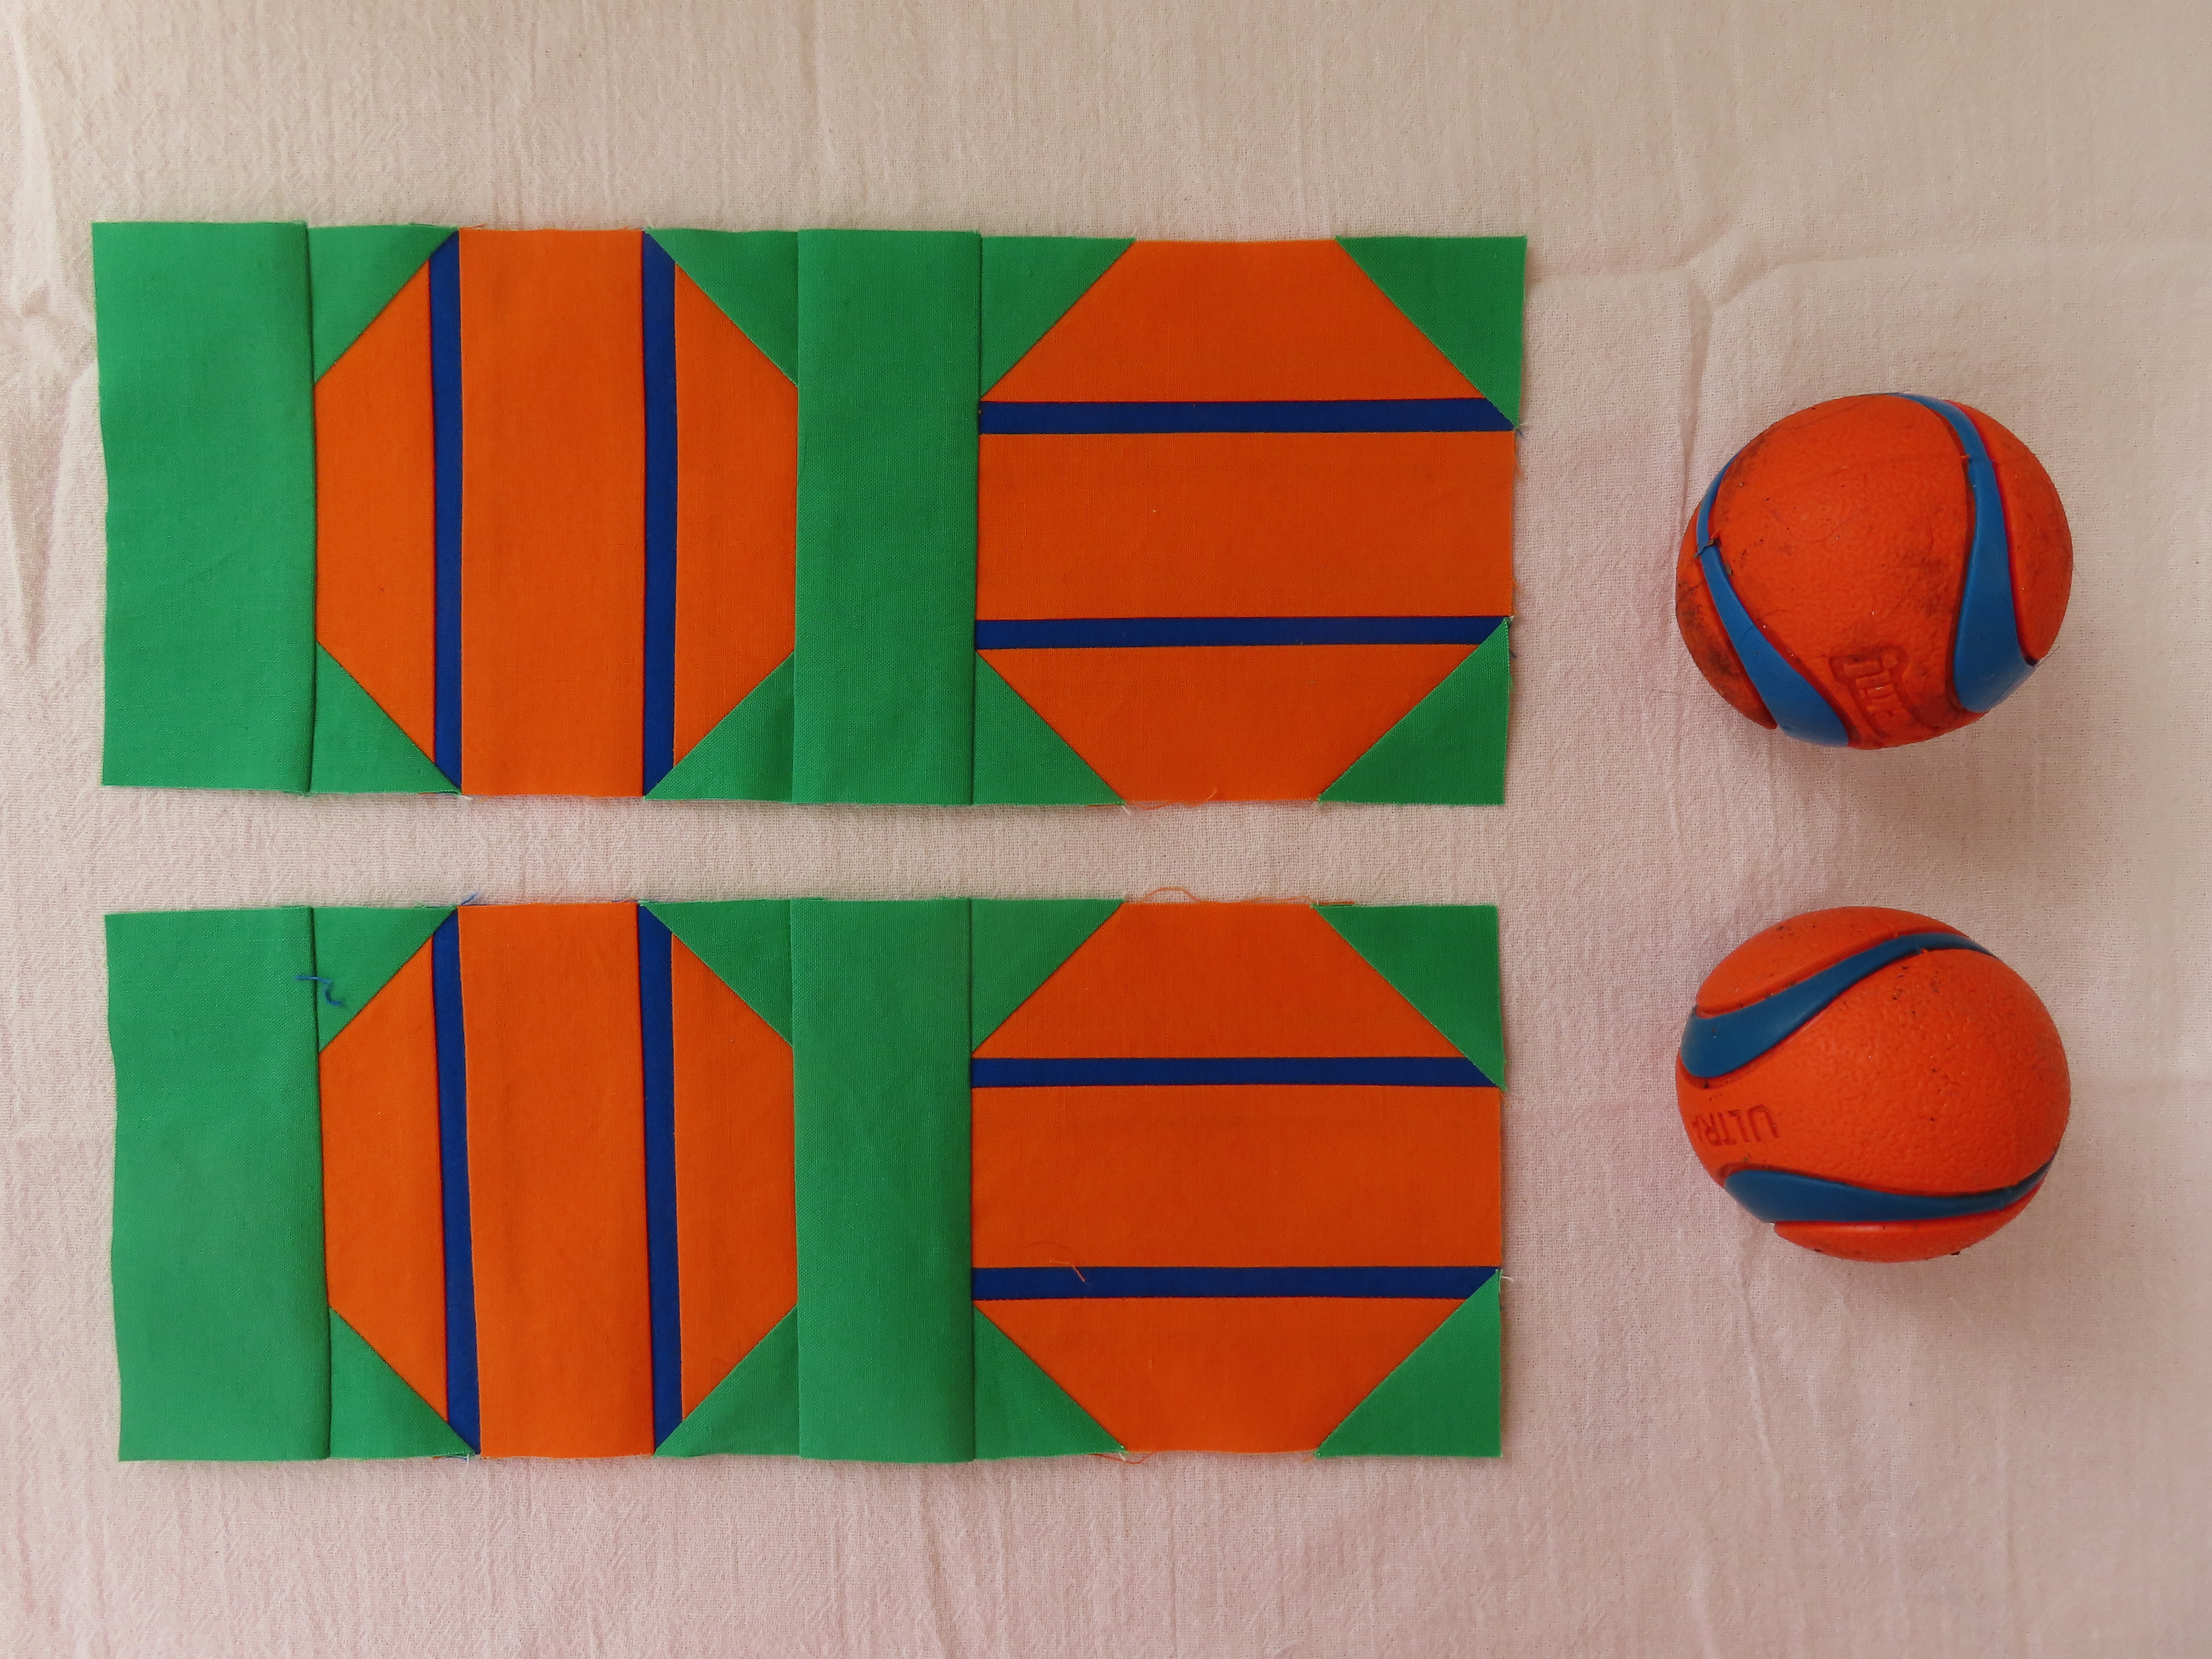
I'm really pleased with how this quilt is turning out! I usually have trouble getting good consistent 1/4" seam allowances but I've been pretty spot on with this quilt. And this quilt really needs accurate seam allowances! I've also started on the tennis ball borders. I got all of the fabrics cut yesterday, but I decided not to do any sewing because it was extremely windy yesterday and we had a little power blip right when I was going to start. We often have full outages after these blips, so I turned off the sewing machine and concentrated on the cutting. This morning I went ahead and sewed the first couple of blocks for the border:

Dog Park - Tennis Ball Border Blocks

I went through all of the instructions with the first set of blocks to make sure I was reading the instructions completely. Now I'll sew everything at each step to get through the sewing more quickly. I also went to the quilt shop and picked up some colorful solid fabrics that I can use for applique flowers to add to the quilt. I'll cut some of those out and pin them to the quilt to see if I like them before committing to adding those.

As I mentioned above, a friend of mine turns 70 in a week. As a gift, I decided to make her a Twice As Nice Pouch designed by Aneela Hoey.

Twice As Nice Pouch - Front

Twice As Nice Pouch - Lining

I used the same fabric that I had used for one of the mini coin purses I made last week because she had admired that fabric from the purse. I think she'll really like this! (And now I need to make one for myself sometime.....)

I was also able to finish the embroidery for my Posy Pocket Handbag designed by Crabapple Hill:

Posey Pocket Handbag - Embroidery

I really like how this turned out! Now I just need to make the bag! And decide on my next embroidery project.

Finally, I've made some progress on my Boublay scarf designed by Laura Nelkin:

Boublay

This kit came with two small balls of yarn, designed for knitting two matching socks. The pattern was written for using one of the balls of yarn, but you could use both balls to make a larger scarf. I decided to continue on with the second ball of yarn, this time pulling the yarn from the outside of the ball rather than the inside to reverse the colors and keep the color transition smooth. I think I will like this scarf better at the larger size.

Nancy


Monday, January 27, 2025

Tippi, Pickles, Lucky, Ginger and Edgar

 Hi all -

I hope everyone is doing well! We made it through the cold snap and are enjoying a couple of sunny days with highs in the 30s. It feels so balmy and wonderful!

I've continued to work on my Dog Park quilt designed by Elizabeth Hartman. I was able to complete 5 more dog blocks this week:

Dog Park - Tippi Block

Dog Park - Pickles Block

Dog Park - Lucky Block

Dog Park - Ginger Block

Dog Park - Edgar Block

Each block is a lot of work, but I'm getting into the swing of things. I should have all of the dog blocks finished in the next week or two. I did make a mistake in the Pickles block. I mixed up the two outer ear units so the ear is more pointy that it should be. I don't think this will be noticeable to anyone but me so I'm waiting until later to decide whether I'll fix it. The units both touch the outside edge of the block, so It won't be that difficult to fix it if I decide to do that.

For a rest from the dog blocks, I also made several Mini Coin Purses from Bernina's WeAllSew blog. 

Mini Coin Purses

I'm on Bernina's email list and they send out "weekly inspiration" emails with short blurbs for projects in their blog. I saw this in one of their emails and thought it would be a good stocking stuffer for my sisters. I made the pink one first to figure out the pattern. I liked it, but I put the hook too far down on the side. I'll keep that one to hold knitting notions in my project bag. The other two are nicer and will be stocking stuffers next Christmas.

It's too dark in my sewing area to do much after the sun goes down, so in the evenings I generally do handwork. One of the projects I've been working on is the embroidery for my Posy Pocket Handbag designed by Crabapple Hill. 

Posy Pocket Handbag - Embroidery

I concentrated on the basket and ribbon first so that the flowers will subtly sit on top of the basket and to make it easier to avoid smashing the french knots with the embroidery hoop. I should be able to finish this in another couple of evenings. 

Finally, I've also made progress on my Boublay scarf designed by Laura Nelkin. 

Boublay

This kit came with a set of two small balls of yarn (designed for making socks) and the pattern is written so you can use one or both balls of yarn in your project. I was thinking I would stop with the first skein, but now I'm thinking that I would like it bigger so I'll probably continue on with the second ball of yarn. I'll decide when I pick up this project again, probably later this week.

Nancy


Monday, January 20, 2025

Bernadette and Cookie

 Hi all -

Wow! Winter sure has set in! I hope everyone is keeping warm! We're in the middle of a cold snap, but we're doing fine. We've had a couple of moose visiting the yard the last couple of days, which I just love! We had two this morning that hung around for a while eating from the pine trees, then they lay down and just hung out for a couple of hours before eating some more. It's so fun watching them! Here's the one I saw first:

Moose in the Yard

He was huge! His friend was a lot smaller. But both were fun to watch!

I was able to start working on my Dog Park quilt (designed by Elizabeth Hartman) this week. I got the first two dogs made:

Dog Park - Bernadette Block

Dog Park - Cookie Block

I'm pretty pleased with these blocks! I used the same colors for the dogs that the designer used, and I'm glad I did that. The colors of the fabrics are very close to each other. When I got the fabrics, I was really worried that the colors in the blocks would be indistinguishable. Even though the differences are small, they really do show up in the blocks. I'm afraid if I had chosen my own colors then there would have been too much contrast between the different parts of the dogs and they would have looked a bit cartoonish. There's a lot of cutting and piecing of small pieces in these blocks, but I'm enjoying it so far.

This week we also had our monthly guild meeting and our previous president handed out kits for making blocks for the quilt that will be made for our current president. That's the tradition in this guild. The kits consisted of instructions and one piece of fabric to be used for the arms/wings in the block. The rest of the fabric would come from our statshes to get a truly scrappy quilt. Here is the block I made:

President's Quilt Block

We were given some guidance as to the colors to use so the quilt should look good in our president's bedroom.

I've also done some knitting this week. I finished my Cuentas Scarf designed by Laura Nelkin:

Cuentas Scarf

And I started a Boublay scarf, also designed by Laura Nelkin:

Boublay

These are both kits that I've received from Laura's "Lola's Choice" club. With this club, we get a new small project every other month. I'm very behind in making these projects so I'm trying to get several finished during her knit-along going on the first quarter of this year.

Nancy