Hi all -
Summer marches on.... We had a hot spell for a week, but now we're back to moderate temperatures and afternoon showers. It's so wonderful!
I finished the block that I started in our guild's EPP class. Here it is:
 |
| First EPP Block |
I don't want to make a quilt out of these blocks so I decided to make a bag. I decided to use the construction from the Mondo bag that I made in this post. It's hard to see in the final bag, but the bag is made from three rectangular panels that are sewn together in kind of a spiral to make the bag shape. In the pattern, the panels are pieced together from squares, but you can really do anything with this construction. So I decided that I would use this construction to make a bag using four of these EPP blocks I started by looking through my stash to find fabrics that I thought would go with the four original fabrics I got in the class kit. Here are the original fabrics:
 |
| Original EPP Fabrics |
I didn't think to take a picture of my stash fabrics, but I pulled a lot of them and I'll probably look at more as I construct the other blocks so a picture of that fabric pile might not be useful. Anyway, I pulled some fabrics and also finished my second block:
 |
| Second EPP Block |
I had to stop here with the EPP because I didn't have enough of the papers to make another block. You can remove the papers once you have sewn around the entire perimeter of the unit, but that only reclaims 8 of the 24 units needed for the block. So it was time to start thinking about the bag. I looked through my fabrics, picked a burlap-like upholstery fabric and cut out all of the pieces needed for the bag and then realized that I miscalculated and the pieces were too small to accommodate the EPP blocks. So back to the stash and this time I chose a pink solid fabric that matches one of the colors in the fabrics. Here is the first block appliqued on the bag fabric:
 |
| First Block Appliqued |
The solid pink might be a bit intense for my tastes for a bag, but I'll get the EPP blocks finished and appliqued to the panels and then I can decide if I want to tone down the pink with some quilting using other colors in the fabrics. To applique the EPP block to the panel, I start by measuring in from the edges the appropriate distance and then marking a line using an air-erasable marker. I can then place the block very accurately:
 |
| EPP Block with Placement Lines |
I really like air-erasable markers for stuff like this because I don't need the marks for long and don't have to worry about having trouble getting the marks out. The picture of the first appliqued block above shows that the lines have disappeared on their own after just a day. This block has a 90 degree corner in it, which means that the "dog ears" on these corners can stick out a bit and be hard to push behind the block while you are appliquing. To alleviate this problem, before pinning the block to the pink panel I took my scissors and clipped the corner of the folded over edge of each of these corners. It's hard to see, but here is one of the corners with that little fold peeking out:
 |
| 90 Degree Corner Before Trimming |
Can you see that little corner peeking out under the side of the block? Here is where I trimmed a little bit off of one of those fabric flaps:
 |
| 90 Degree Corner After Trimming |
It's not much, but I think it made a big difference when it came to appliquing the block. The trimming had to be done immediately before pinning and appliquing the block because what can really sneak out from under these edges are the threads when they unravel a little bit with wear. Doing this trimming and then immediately doing the appliquing gets those edges protected so they can't unravel and peek out. Once the block was pinned, I appliqued it to the background using a narrow zig-zag stitch and invisible thread. Here is the second block all attached to the bag panel:
 |
| Second EPP Block Appliqued |
With the paper pieces reclaimed from these units, I can now start on my third and fourth blocks!
When taking breaks from sewing, I've continued to make progress on my Festival of Stitches shawl designed by Lisa Hannes. I finished a narrow eyelet section and then a cable section on one side of the shawl:
 |
| Festival of Stitches close-up |
 |
| Festival of Stitches |
 |
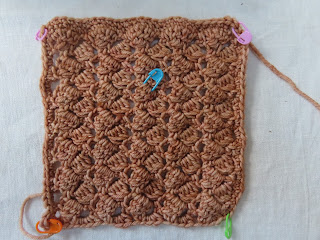
| Wildflower Crochet Blanket May block #13 |
 |
| Wildflower Crochet Blanket May block #14 |
 |
| Wildflower Crochet Blanket May block #15 |
I still need to add the May section to the larger center block. I tried to do that based on the written instructions, but my stitches didn't match the picture so I'll have to watch the associated video before I can finish that block.
That's it for now. I hope everyone is doing well!
Nancy
Your EPP blocks are gorgeous and yes, those pesky folds sometimes are sneaky!!!--TerryK@OnGoingProjects
ReplyDelete