Hi all -
Today's post will cover the classes I took at Houston this year. I always go crazy and load up on classes. It's definitely tiring, but generally well worth the effort. And this year was no different.
About Face -- Applique Portraits with Charlotte Warr Andersen
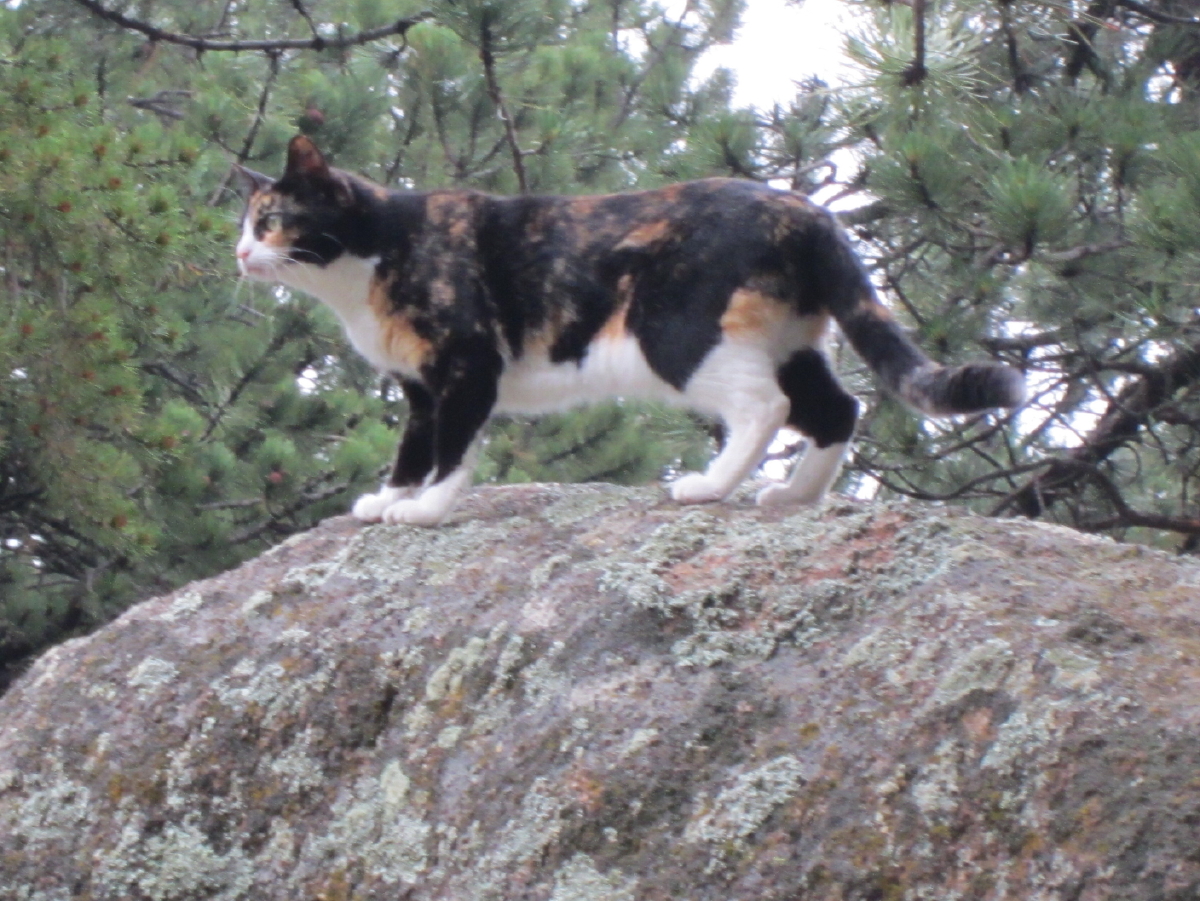
This class ran for 3 full days, Monday through Wednesday. It covered how to make a portrait quilt, animal or human, starting with the picture and going all of the way through the completed quilt top. I took this class because I have a picture of Lance that I took on the day that I brought him home from the Humane Society that I've always wanted to make into a quilt. We had to send our pictures to Charlotte ahead of time for her to approve and luckily she approved mine because I was really dead set on using this one:
This picture always melts my heart! I love that it caught his expressive eyes and his cute ears.
The first day of class was spent learning how to make the pattern from the photograph. Charlotte had a great presentation and walked us through making a pattern using a photograph of Channing Tatum. Since she wasn't actually making the quilt, she didn't have to worry about copyright issues so thought we should have some eye candy while we learned. Can't fault that thinking!
She also showed us several examples of her work and talked about what techniques she used:
I have to say I'm always a bit leery of human portrait quilts because I generally find the faces creepy, but Charlotte's faces are incredibly realistic and I loved them. Here are a couple of her samples to show you how incredible her faces are:
After the presentation, Charlotte sat down with each student individually to help them with their patterns. This second part was pretty boring, but I can't think of a better way for her to do this and it was really nice to have her individual help on this part. Here's my pattern for Lance:
I'm very happy with how the pattern turned out, but now it's time to stitch it. Charlotte's preferred method of applique is needle-turn, although she did talk about a couple of fusible methods and had some examples for us. I'm not very good at needle-turn applique, but I'm always up for a challenge. Charlotte has a great method for putting together these quilts using mostly reverse applique. Her technique allows you to make some pretty small pieces fairly easily and it also allows you to applique the face together before picking out the background, like you can with fusible applique. I found that to be very clever!
When talking about the applique, Charlotte showed us in detail how to do eyes and mouths. These are the most difficult, yet most important, parts of the face so it was good to have the details. She had a detailed handout as well as step-outs where she showed each step in the process. It was really useful, especially since we could also take pictures of the step-outs to help us at home. One of her set of step-outs showed us how to do this face:
And, for those of us doing animal portraits, she had step-outs showing how she made this bear portrait:
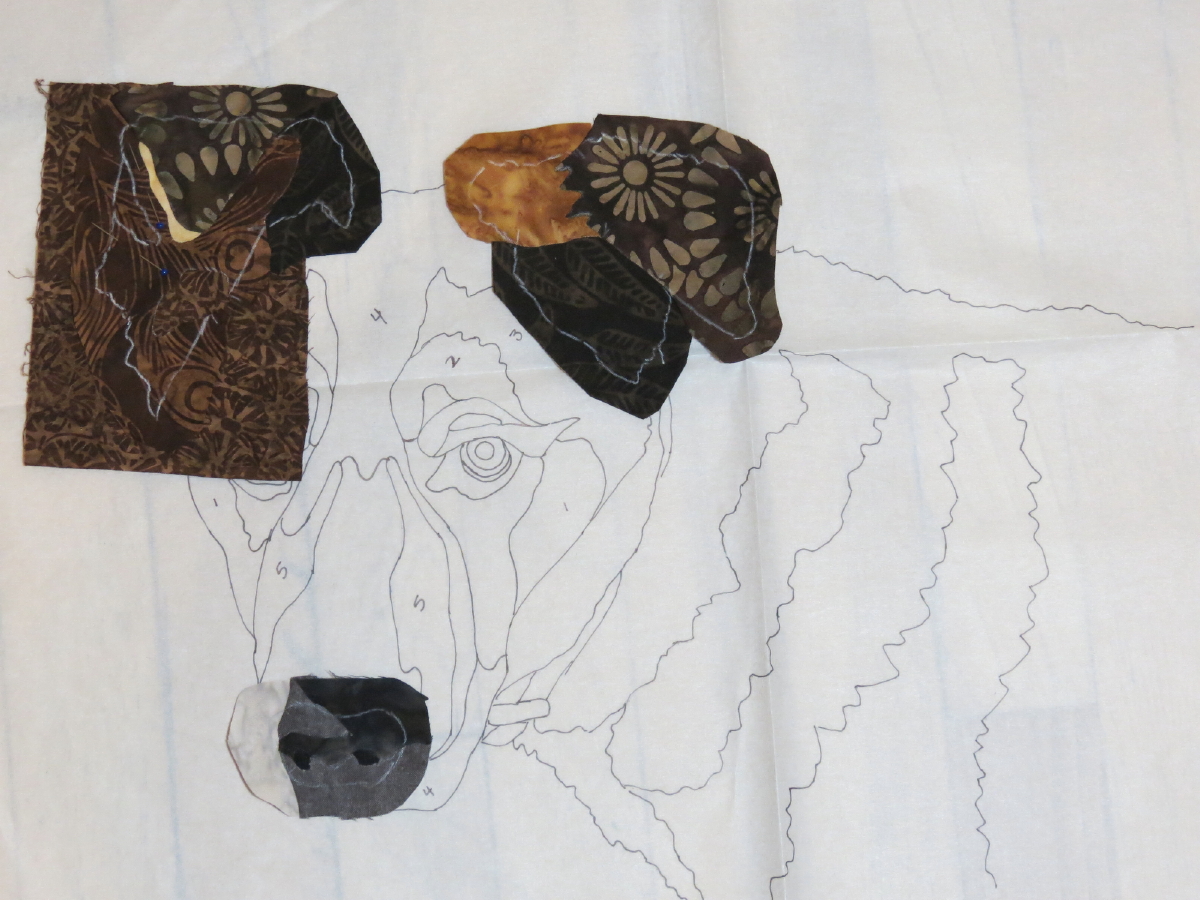
I have to make a confession that, which I loved this class, I didn't get very far on my project. I had slipped on Sunday and must have torqued my back because I found it extremely painful to sit in class and ended up doing most of my hand applique while standing up. Also, I was really excited and distracted waiting for the awards to be announced on Tuesday night. So all I got finished in class were the nose and ears:
If you are interested in making a portrait quilt then I highly recommend this class. When I got home, I ordered both of her books on the subject since she didn't have copies to sell in class.
Candy Land with Debby Brown
I took this class on Monday night. After signing up, I never looked back at the class description so I had no idea of what to expect, just knew that I didn't have to bring any supplies. In this class, we learned a bunch of variations on the ribbon candy quilting pattern. Debby was a very interesting and funny teacher:
She had sample quilt sandwiches prepared for us so we could get right to work. She gave us a handout with a bunch of ribbon candy variations. Starting with the simplest, she drew out how to stitch the design and then let us at it. We were using the HandiQuilter Sweet 16 sit-down machines, so she also did a demonstration of quilting with rulers on a sit-down machine for anyone who was interested:
This was my first time using these machines so it was fun to give them a try. Here is my sample from the class:
And a close-up of a couple of the variations. I really like the ones in the middle that look like the guy from "The Scream". That was from me working ahead and not noticing that she had the points meeting up with the loop at the top of her example, as is done on the line above it in my sample:
This was another class that I really enjoyed and would highly recommend to others.
Woven Watercolors with Pam Holland
Thursday was an all day class with Pam Holland. This is the second class I've taken with Pam and I've loved both of them. Her classes are so diverse (the other class I took was her alphabet class last year) and always push my creativity because she is a true artist (and a wonderful lady).
In this class, we were working on an underwater scene like the bottom portion of her sample:
We brought the background fabric, batting, backing and quilting thread. She supplied the fish fabric for the appliques, hand-dyed cheese cloth and fabric ink markers. For these quilts, we started by fusing some fish appliques on our backgrounds. We then sandwiched our quilts and did some widely spaced quilting lines to hold everything together. We laid the cheesecloth on top and then it was time for some heavy quilting. Here's how far I got in class:
Once the quilting is done, I'll use the markers to highlight the fish's bodies a bit and to add some shadows. Then I can add other embellishments like some hand stitching and some beads. I think this will be pretty cool when it's finished.
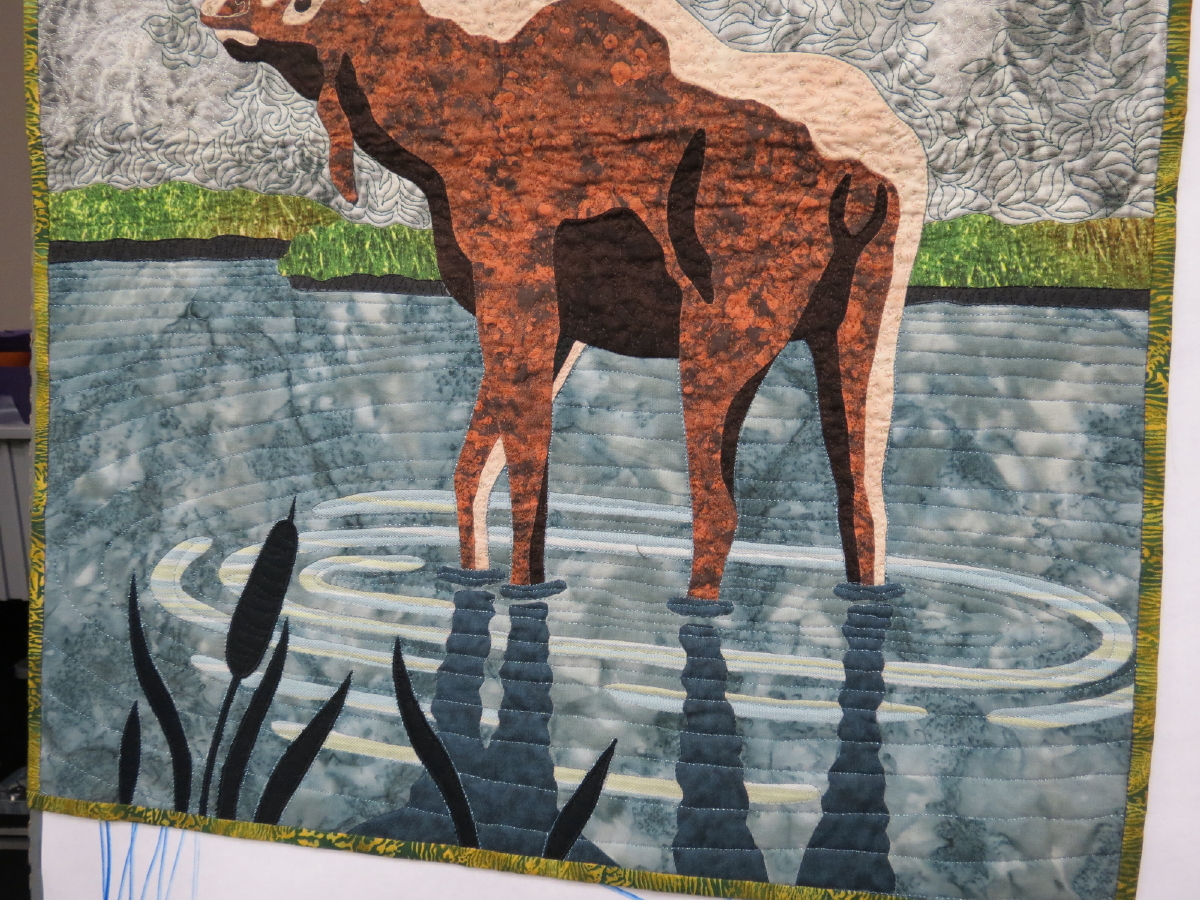
Here are a couple of Pam's other quilts to give you an idea of her versatility:
She had a whole bunch of other samples of her work, but somehow I didn't get pictures. Who knows what I was thinking! But I'm sure I'll get another chance since I'll be taking more classes from Pam whenever I get a chance.
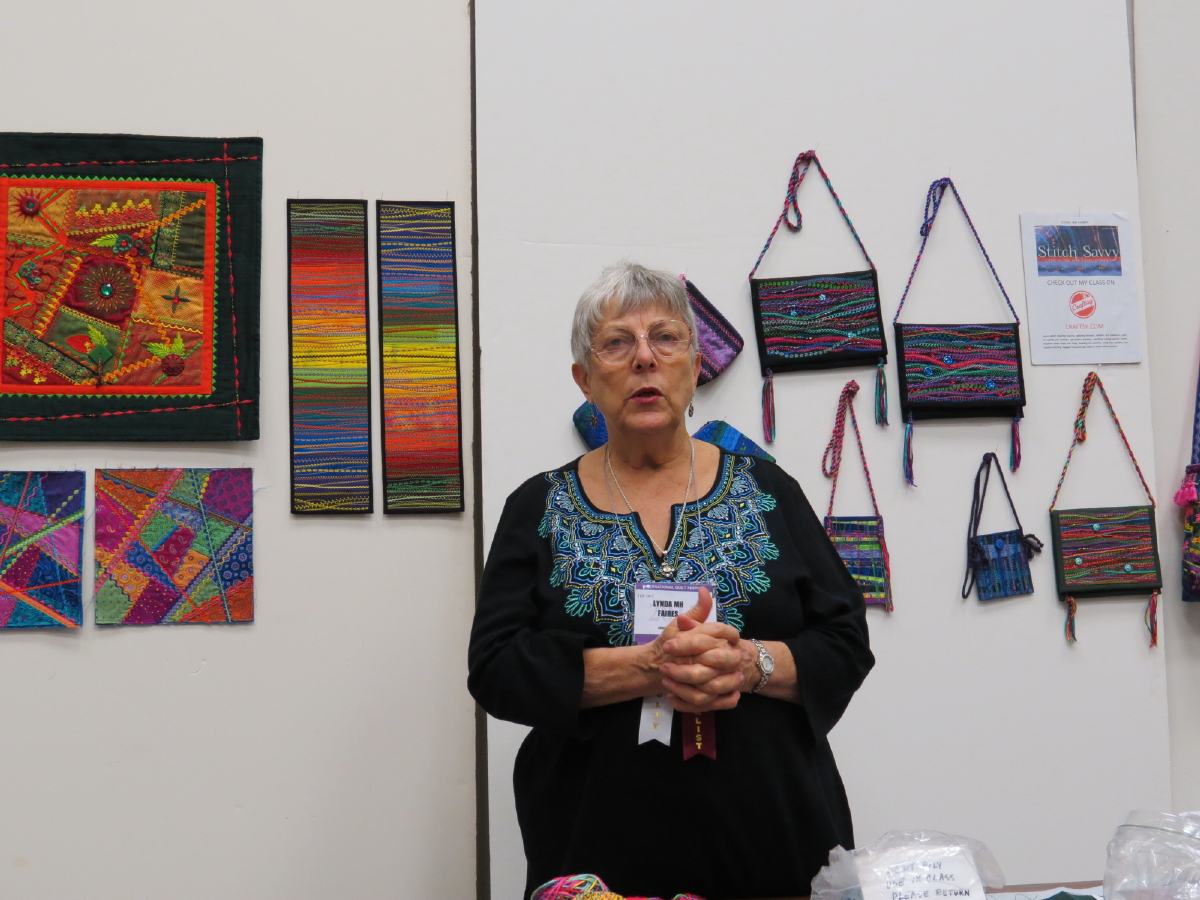
Machine Embellished Artist Bag with Lynda MH Faires
Friday night was a fun little class with Lynda Faires. After I signed up for this class, she came out with a Craftsy class (called
Stitch Savvy) that I took and absolutely loved about some cool ways to embellish your quilts using your computerized sewing machine. I mentioned this class in an earlier post. Anyway, now it was time for the artist bag class.
This class was also a lot of fun. Lynda provided everything for this class, including a wide variety of threads to sew with and fibers to couch. Here are her samples of the bag we were making:
It was a lot of fun spending a relaxing evening playing with threads, stitches and fibers! Here's how far I got in class:
I look forward to playing some more and finishing this up with all of the fun stuff I have at home.
One other thing I learned in class is that I really love my Berninas. I used a Pfaff machine (if I remember right) in this class and it was a nice enough machine, but it really didn't feel anywhere near as sturdy as my machines at home. And it had a little pop-on foot that kept falling off when I had the presser foot lifted. I really love the sturdy Bernina feet!
And here are some more of Lynda's pieces to show you what beautiful work she does:
Beautiful! Lynda actually lives nearby and I was able to go to her house after we got back to buy some silk fabrics that she was wanting to get rid of. I'll show you some pictures of those in another post. I'm really excited to use them!
Silk Sashiko with Carol Ziogas
On Saturday morning it was time for some hand stitching. This was a tough morning with a lot of flooding around Houston. The teacher was staying on the other side of town and the buses stopped running and the taxis wouldn't drive out there, so she ended up having to have a friend drive out and bring her back to the convention center. As a result, class started almost an hour late. Those things happen, not much you can do about them.
This was another class where the teach supplied everything. Sashiko is normally done on cotton cloth with cotton thread, but this class was part of the silk series they have at Houston each year so we used silk cloth and thread.

Carol was an enthusiastic teacher and seemed very knowledgeable about sashiko and silks. And she was very personable. But I didn't feel like there was much teaching going on in the class. Her answer to pretty much everything was "however you like". While I appreciate a teacher who understands that there are many ways to do everything and different things will work for and appeal to different people, if I'm taking a technique class then I want to learn how she does things so I can see how to apply her methods to my style. She did include a different kind of thimble in her kit that she likes to use. This thimble sits on the middle section of your finger rather than on the end of the finger so that you can push the needle with your finger straight, which is easier on your hand. (Sorry, I didn't think to take a picture of it.) She talked about how to use it, but I couldn't get it to work for me. Then we just sat in class and stitched. Here's what I did:

Even with the late start, I was ready to leave before the end of class because I had already gotten everything out of it that she was giving. So this is one class that I wouldn't recommend to others.
Gridplay Quilting with Charlotte Warr Andersen
Saturday afternoon was another quilting class on the HQ Sweet 16 and another class with Charlotte. When I signed up for my classes I didn't pay close attention to the teachers and didn't realize I would be stalking Charlotte, but that's how it turned out. For this class, we brought practice quilt sandwiches and marked grids on them using pounce pads. It was kind of a pain trying to get the whole class through the marking process, but it worked okay. I ended up just marking quick imperfect subgrids on my piece rather than waiting in line since the powder disappears as you quilt anyway so it was nice to have lines that would stick around.
In this class we learned a bunch of different background grids.
We started off with square grids, but also looked at triangle and hexagon grids. Charlotte had handouts with all of the fills and would also draw them out to show us the path she used. She had a lot of cool fills to share! Here is my sample from the class:
Sorry that a lot of it is hard to see. The machine I sat at had white thread in it. But the machine helper brought me some green thread part way through the class so that my stitching would be easier to see. Here's a close-up of some of that so you can see it better:
And here are some examples of gridded fills in Charlotte's samples:
Beautiful!!
Texturizing Pictorial Quilts with Charlotte Warr Andersen
Yep, I continued to stalk Charlotte on Sunday morning. This class concentrated on how to quilt realistic landscape quilts.
Charlotte divided this class up into different parts of the landscape quilt: skies, water, grasses, mountains/rocks and trees. Again, we use pounce pads to transfer the base designs, and then I went over the lines with my water-soluable marker so they wouldn't brush off before I got to them. And again, Charlotte had good handouts and would show us how to do the different stitching with a marker and then off we went. Here are my samples from this class:
And here are some of Charlotte's samples:
This is another class that I would recommend to others.
Whew, I sure did stay busy while I was there!!
And now, just for fun, I thought I would share my purchases with you. I have enough stuff at home and I've gone to Houston enough now that I don't really do a lot of wandering through the vendor aisles while I'm there. But I do have a couple of specific vendors that I like to visit every year.
My first stop is always SewBatik. I love their fabrics -- always high quality, beautiful colors and fun designs. And, of course, the owners are the nicest people in the world! This year I decided to pick up some mottled solids:
These are always useful!
My next stop is always the Tambani booth. For those who haven't heard of them,
Tambani is a non-profit organization that provides work making embroideries for women in South Africa so that they can support their families. The embroideries are beautiful and each depicts a folk tale, which is included with the embroidery. Here are the ones I picked up this year:
I don't have any definite plans for these yet, but I do like to collect them. I had started making little quilts out of them for the Alzheimer's Art Quilt Initiative, allowing me to donate to two deserving organizations, but then AAQI ended so there went that idea. Now I'm thinking it would be nice to design a show quilt using these embroideries to try to bring them to the attention of more quilters. So that's on my long list of ideas to work on in the future.
Another favorite booth is ArtFabrik, Laura Wasilowski and Frieda Anderson's booth. I collect more of their beautiful hand-dyed silks and perl cottons each year:
The silks are expensive, but I figure I can splurge a bit each year and then have a wonderful selection when I finally sit down to make something. Silks quilt up so beautifully!
I periodically also splurge at the Cherrywood booth. They are pretty expensive, too, but their hand-dyed cottons are beautiful with a texture that looks like suede:
I really didn't plan to get this much, but then I figured I could spend some extra money since I won some this year.
I also picked up some embellishments:
The hand-dyed fibers I bought from Lynda in her class. I couldn't believe how cheap they were! Each card was either $2 or $3, so I picked up a bunch of them. The beads I got at a couple of bead booths. I wanted to pick them up for a beaded embroidery pouch I'm making for my sister for Christmas. I'll have a post about the pouch later.
Finally, just a few odds and ends:
The magazine came free with the renewal of my membership to The Quilt Show. The ruler I picked up in Debby's class. This is the ruler that she uses for matchstick quilting and it looked like it was a good one.
Well, that's it for my Houston posts. I hope you enjoyed them!
Nancy


