Hi all -
Boy, is time flying! I can't believe it's Thanksgiving week already! I hope everyone has a wonderful holiday!!
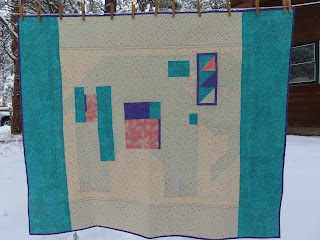
I've made great progress on my brother-in-law's quilt. I started working on the quilting. I started by just stitching in the ditch (SID) around the cream areas in the log cabin blocks. At this point, I wasn't sure how I would be quilting the quilt, but I knew that I wanted definition between the cream and brown areas so I started with that. I didn't want to stitch around each separate block in case I did some kind of quilting that flowed from block to block. The SID quilting gave me a good backbone for the quilting so I would now be able to quilt wherever I wanted without worrying about anything shifting. Next, I stitched around the edges of the applique in the top panel and then did a simple meander in the background:
 |
| Oak Leaves - Top Panel Quilting |
Since I did a meander in the panel background, I decided to continue that in the cream parts of the log cabin squares. This quilting ignored any block boundaries so I was glad that I hadn't done SID between the blocks. With the curvy meander in the cream parts of the blocks, I knew I wanted straight line quilting in the brown areas to provide some contrast. I decided to quilt lines from the corner of each block to the corners in the centers of the blocks. This is hard to describe in words, but here are some pictures to help explain it:
 |
| Oak Leaves - Brown Block Quilting Front |
 |
| Oak Leaves - Brown Block Quilting Back |
I hope you can get an idea of how this quilting looks from the pictures. For these areas of the blocks, I'll also be doing SID around all of the edges to define everything I think this will give a cool texture to the quilt! Because of the way the blocks are situated, this means that none of the quilting in the brown parts of the log cabin blocks will touch the edge of the quilt so I could add the binding to the quilt before finishing this part of the quilting. So I moved to the binding after quilting those two sample blocks. I decided to use a scrappy binding to match the scrappiness of the rest of the quilt. Because some of my strips were fairly short, I sewed together enough strips to bind about half of the quilt and shifted things around until I was sure that none of the seams between the strips would land in a corner. Then I sewed that long strip to the quilt leaving a long unsewn tail. With that part secure, I sewed more strips together and positioned them to make sure I wouldn't have any seams in the corners, sewed that strip to the strip already attached to the quilt and then finished attaching the binding to the quilt. This method worked really well for me and I'll definitely use it again when I do another scrappy binding! Now I'm working on hand sewing the binding to the back of the quilt. I make pretty small stitches so this part of the process can take a while for me. I was able to get half of the binding finished yesterday and I'll continue to work on it today. I'm trying to be mindful, also, to not strain my thumb while I do this. When I do a lot of hand stitching, I get some pain in the joint where my thumb attaches to my wrist. I've always just ignored this and powered through, but I'm realizing that I'm getting older and don't want to do any permanent damage to my joints that would preclude me from doing the crafts that I love, so I'm trying to take breaks and also apply some heat to the area. It's not a bit deal now, and I hope it remains that way for a long time to come!
I also went back to my Olney St. Scarf designed by Betsey Sennott. I wanted to finish it this week and I accomplished that goal.
 |
| Olney St. Scarf |
It always feels good to finish up a project! This scarf will be nice to wear in the cold winter months! Now I need to decide what other crochet project to work on next. I'm not sure if I want to finish up another project or start something new. We'll see how my whims steer me!
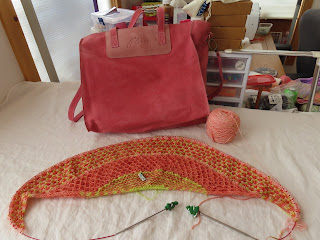
I was also able to make some more progress on my Stitchscape Shawl designed by Malia Mae Joseph:
 |
| Stitchscape Shawl |
The rows are getting long so it's taking longer to finish each section, but this knitting is really enjoyable! I really love the textures I'm getting!
 |
| Stitchscape Shawl - Close-Up |
 |
| Stitchscape Shawl - Another Close-Up |
I look forward to spending more concentrated time on this shawl once my brother-in-law's quilt is finished!
Nancy


