Friday, November 6, 2015

Houston -- The Contest Quilts

Hi all -

Where to begin to describe Houston? This year I'll start with the contest quilts. Since this is my blog, I think it's okay to start with my quilt. Tea for Two actually won 2nd place in the Merit Quilting - Machine, Stationary category! How exciting! It was a dream come true! Here we are:

Tea for Two by Nancy Rehak
There were so many beautiful quilts in the contest! I wish I could share them all with you, but that would just take too long. So, instead, I'll just share some of my favorites.

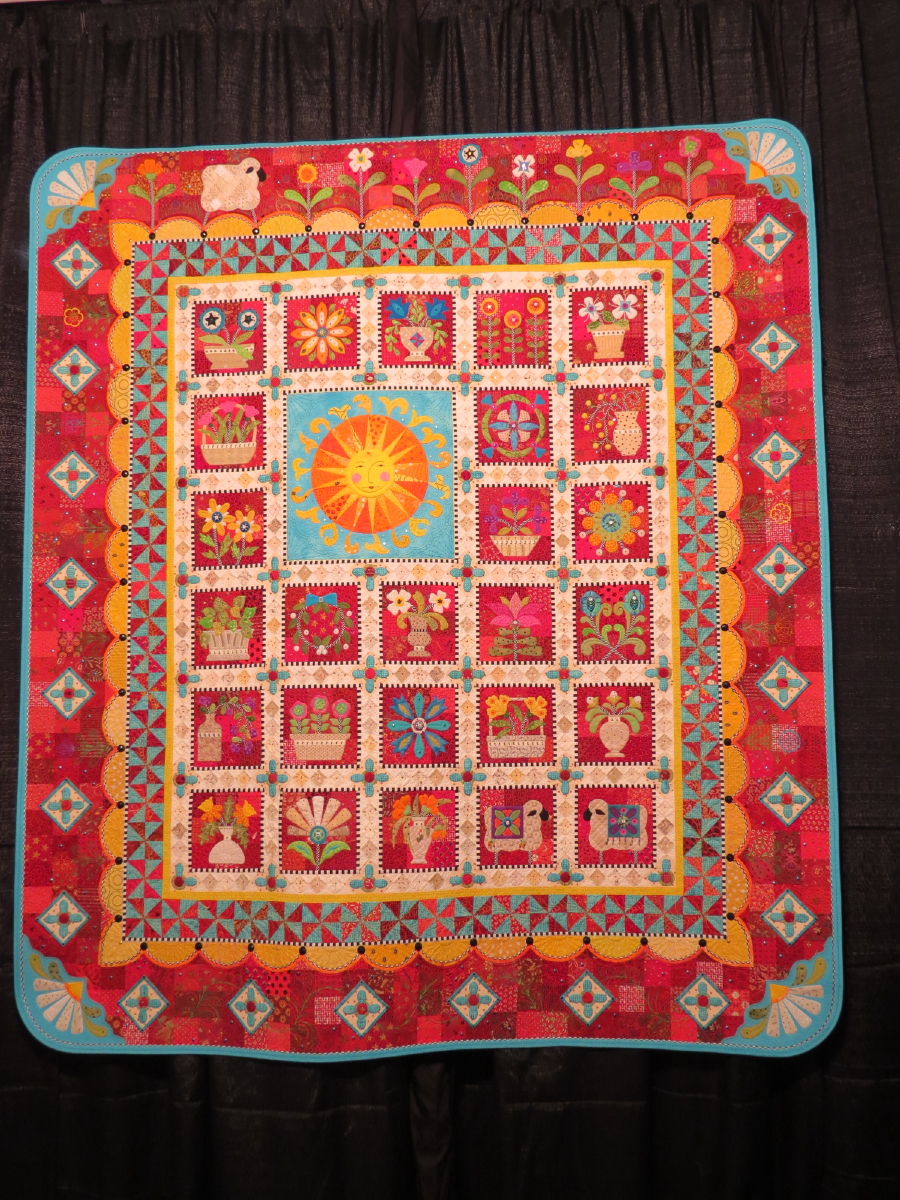
The obvious place to start is with the big winners. I was so excited when Janet's quilt won Best of Show! She's such a sweet lady and an incredible quilter!!

Ewe Are My Sunshine by Janet Stone


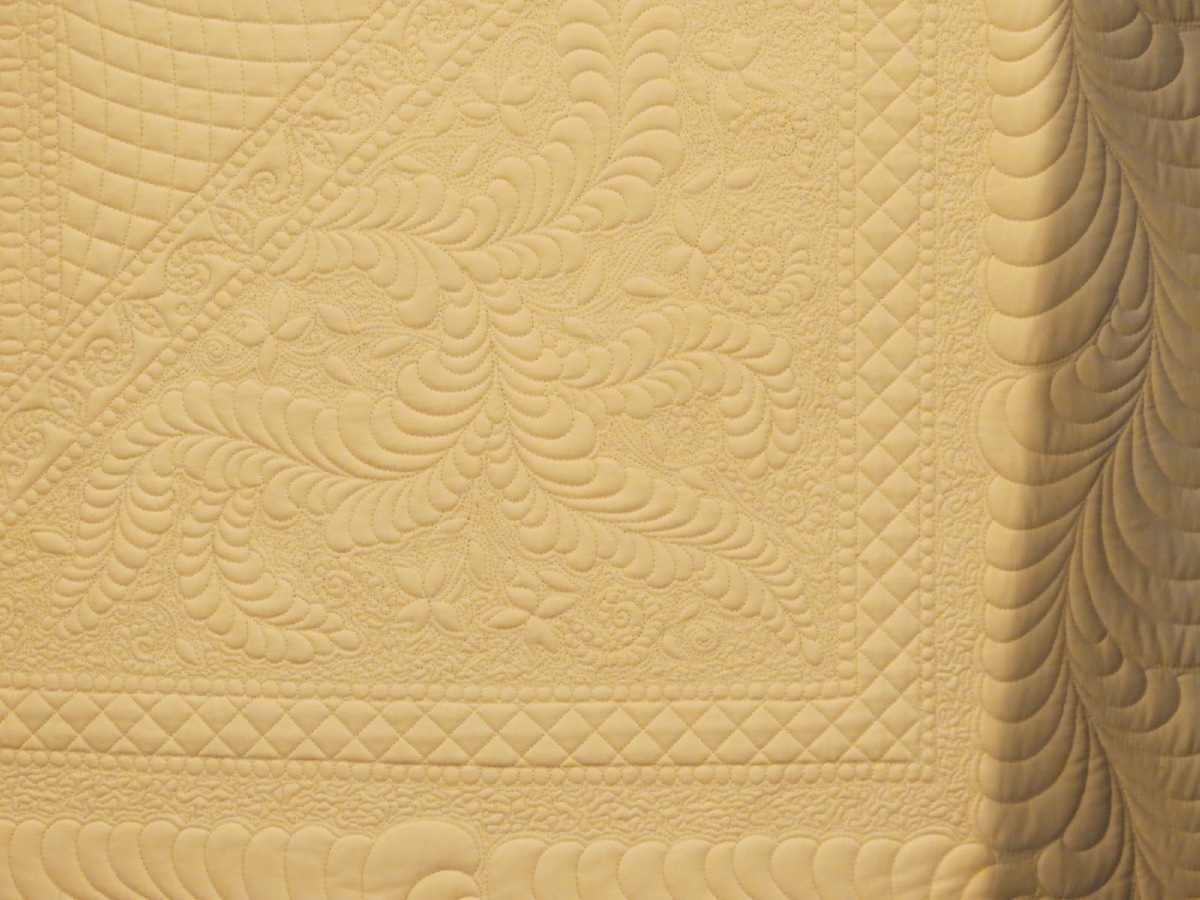
Ewe Are My Sunshine Detail
With the artist....


And the other big winners:

Blue Plate Special by Susan Stewart
White Holes by Peter Hayward
End of the Spin by Melissa Sobotka
My Sweet House with Kirara by Ayako Kawakami
A Quilter's Garden by Kristin Vierra
A Quilter's Garden Detail
Eager to Learn -- Afghanistan by Gillian Shearer
Brilliant Rose by Junko Fujiwara
Breathtaking, aren't they? And, as usual, the pictures don't do any of the quilts justice!

Another favorite quilt of mine is Breaking Wind by my friend Peggy Kragnes. This wonderful quilt, which came to Peggy in a dream, won 1st place in the Art - Whimsical category:

Breaking Wind by Peggy Kragnes
This was the first time I'd gotten to see this quilt in person. I had seen pictures of it in On Track! magazine, but didn't realize how large it is. For some reason, in my mind it was only 35-40" wide. In actuality, the quilt is 80-90" wide. You really have to see it in person to appreciate it. Each of the quilts on the clothes lines are separate individual quilts attached at the top. And the quilt on the left is Breaking Wind, which has another Breaking Wind inside of it! Here are some detail shots to hopefully help you see the intricacy of this quilt:

Breaking Wind Detail
Wow!!

I also have to show you one of my other favorite quilts, which also won 1st place in my category, Merit Quilting - Machine, Stationary. I believe I shared pictures of this quilt this summer when I got to see it hanging in the Kansas City Regional Quilt Festival. It is No-L by Janet Stone:

No-L by Janet Stone
No-L Detail
Honestly, it's an honor to win 2nd place behind such an incredible quilt!

To add to the fun, I got to see another beautiful quilt by another friend, Betty Jo Tatum. Her Canterbury Knight quilt made it into the show, too:

Canterbury Knight by Betty Jo Tatum
Isn't that beautiful? The details are incredible!

And here are some other quilts that I enjoyed:

Duet #4 by Caryl Bryer Fallert-Gentry
Little Punkin by Maria Elkins
Aggregating Anemones by Carla Stehr
Bailando en la Noche (Dancing in the Night) by Shelly Stokes
Duck Face by Hiroko Miyama
A Toast to Toulouse-Lautrec by Kay Donges and Susan Slaton
Poor and Rich by Janneke de Vries-Bodzinga
Who's Looking at Whom? by Diane Harris
Why Knot? by Tanya Brown
Disappearing Bees by Christine Alexiou
My Dream Rose by Masako Kato
Sparkling by Mitsuko Hashimoto
Little Garden by Yasuko Sugaya
Magnolia by Fusako Takido
Charming Chintz by Linda Roy
Reborn by Molly Hamilton-McNally
A Bouquet for You by Rumiko Ooiwa
Ghosts by Ruth Montalvo
Pure by Sachiko Chiba
Let's Do the Dresden Twist by Teri Cherne
The Paisley Peacock by Bethanne Nemesh
The Shell Collector by Bethanne Nemesh
Sea Breeze by Pat Kuhns
Come on to My House by Aki Sakai
Exuberance by Marilyn Badger
Flowers in the Crystal by Kiyoko Ishihara
Magical Zone by Keiko Ike
Why Not? by Angela Petrocelli
Believe it or not, that's just a small taste of the many beautiful quilts on display at Houston this year! It was such a joy to see them all and I wish I could share them all with you, but I guess you'll just have to join me in Houston next year to see them all.

Nancy


Sunday, October 18, 2015

Lake House Romance SID Done

Hi all -

Well, I've finally finished the stitch-in-the-ditch quilting on my Lake House Romance quilt. Whew! That was a lot of work! But, in the end, well worth the effort. Since I used invisible thread on the front, you can't see much difference there except that it's a little less baggy than it was before:


But I like to use colored thread on the back so you can see the new quilting there:


It's hard to see in the pictures, but on the back of the quilt I wanted to have green thread for all of the SID around the green squares, and blue thread for the remaining SID which would just be on the outside of the blue blocks. To do the green SID, I used the following stitch path:


I used this path for a couple of reasons. First, whenever I have quilting lines that need to connect, like they do at the corners where the green squares meet, I like to cross my lines rather than try to get them to touch because I hate the look you get when they don't quite meet. I hope that makes sense.My second reason for using this quilt path was that it required less rotating of the big, heavy quilt. With this path, I was able to quilt 4" before having to turn the quilt 90 degrees for the next line. Of course, you have to be very careful when quilting lines that cross each other or you'll end up with puckers on the back. To reduce this problem, I quilt with my hands making a triangle around the needle and pull the fabric down a bit with my thumbs to keep things flat. I wish I could show you a picture of this, but I don't have a way of holding the camera while doing this.

For the blue SID quilting, I had to use this more difficult path:


 With this stitch path, I had to rotate the quilt 90 degrees after every 2" of quilting. Not fun! But it was necessary for the look I wanted on the back.

Since the blue SID quilting was so tiring, I took a couple of days off this week to do some knitting. Every 10 years or so, I get the bug to learn to knit again. I always seem to do it just long enough to get the hang of it a bit, but not enough to make it second nature for me. We'll see how it goes this time! To get started again, I went to Stefanie Japel's Knit Lab class on Craftsy. I thought this was a wonderful class and I really enjoyed the class project, which is the Lacy Keyhole Scarf. Here is my first try at this scarf:


 The scarf is actually a purple color that is in between the picture of the whole scarf and the detail shots of the ends. It's definitely not perfect, but I do really like how it turned out. Here's what it will look like when worn:


 I bought a couple of other yarns and thought I could make one of these scarves for each of my nieces.

Well, I'd better get back to work on my Lake House Romance quilt. Right now I'm quilting the straight lines through the centers of the blue squares. That goes pretty quickly so I should have that finished today. Then I can start working on the feathered hearts.

Hope you're having a great week!

Nancy

Sunday, October 11, 2015

TQS Taping 10/9/2015

Hi all -

On Friday, I got to attend another taping of The Quilt Show. It was a lot of fun and I feel very fortunate that the tapings are done so close to home. As usual, two shows were taped. The first show was with Jenny Bowker, an Australian quilt artist who makes beautiful landscape and portrait quilts, among other things. The second show was with Charlotte Hickman who specializes in nature quilts.

On taping days, you start out by waiting in the lobby while they do some prep work on the set, like hanging the quilts. Then the audience gets to come in while they finish their prep work.


While we wait, John explains the rules and the procedure and then just keeps us entertained with jokes, interesting tidbits, surveys and anything else he comes up with.


We started off by shooting the intro with Justin in the audience:


Then we got to watch the taping of the intro. Jenny is a really sweet lady who I'd love to know in person! She's bright, kind and very interesting. Her husband is a retired diplomat, so she's traveled quite a bit. She's a very diverse quilter, making use of a lot of different techniques. One type of quilt she makes melds landscape quilts with traditional blocks:


I think this is a really cool technique that I would like to try sometime. She also does some incredible portrait quilts:


Isn't that incredible? For her first demo, she showed Ricky a technique where she takes a large print fabric and cuts a square that crops off some of the image. She then adds borders and quilts around the images in the print fabric, extending the images into the borders with the quilting. Here they are discussing things before taping the demo:


It's a very cool technique that I'd just read about in one of my magazines, so it was fun to realize that this was the lady who was doing this and to watch as she showed us how. Her second demo was something completely different. For this demo, she showed us how to design tile quilts like this one:


Did I mention how diverse her quilts are?? Here she is talking to Alex before this demo:


After the taping was finished, she came out to answer questions from the audience:


I was very enchanted with this sweet lady.

After lunch we came back in to a set decorated with all new quilts.


We found new seats and the second taping began. Charlotte is a knitter turned quilter, so she tries to use her knitting supplies in her quilts. She makes nature quilts with a lot of thread-painting and embellishments. She makes quilts with trees in them, where the tree trunks are created using wool roving:


Isn't that incredible? Her first demo was with Alex. She showed how she needle-punches roving into canvas and then cuts her tree trunk appliques from that. Very cool! Here is another one of her tree quilts and a close-up showing some of the great embellishments:


Can you see all of the beads and hand stitching she's added to create all of the details? She also does a lot of thread-painting in her quilts, but my pictures just didn't do justice to the texture that this adds. In her second demo, she showed us how she does her thread painting. After the taping, she, too, came forward to talk to the audience:


It really was a fun day with a lot of interesting techniques to learn.

Nancy


Sunday, October 4, 2015

Jukebox Quilts

Hi all -

In this post, I wanted to give a shout-out to Jukebox Quilts in Ft Collins and especially to Renelda (sorry if I butchered your name!)  who helped me a bunch this week. I've talked about how much I dread pin-basting the large bed quilts. I'm just too old for this! Not to mention that it's hard to clear enough floor space to do this and I haven't had the best luck doing this on a table. So, instead, I decided to try renting one of the longarms at Jukebox Quilts and basting my sister's wedding quilt using water-soluable thread.

Last Tuesday I took the day off from work and made the trek up to Ft Collins, a 2-hour drive for me since I first have to stop in Boulder to drop my dog off at daycare. I had packed up 4 quilts with backings and battings, just in case, since I didn't know how it would all go and I wanted to make the most of my time after the long drive. I also brought several cones of Superior's Vanish Lite and Vanish Extra since I wasn't sure how much thread this would take or if the Vanish Lite would be strong enough to do the basting. When I got to Jukebox Quilts, Renelda was there to help me figure out how to load the quilt and get started. It's hard to believe it, but Jukebox Quilts rents their free-motion (i.e., not computer controlled) longarms for $15/hr and that includes assistance so you don't have to worry about not knowing how to use the machines. They also rent computer-controlled systems, but I don't know how much they charge for those. I started with my sister's wedding quilt since that one has to be finished by Christmas. Renelda helped me get everything prepared and loaded. They use Red Snappers for loading the quilts. This is the first time I've used those and they're great! Then I just "quilted" trying to get the stitching about 4" apart (although I often went looser because I get lazy). I was able to use the Vanish Lite in the bobbin, but had to switch to the Vanish Extra in the top.

I was able to baste 3 over-sized queen quilts in 5 hours at the longarm. She had me use a basting stitch which made a stitch every 1/2" so the machine made me go a lot slower than I would have liked, but we weren't sure if the thread could handle regular quilting. I have an HQ16 at home with a table too small to handle these quilts, but I think I'll experiment with basting smaller quilts on that machine to see what I can do. (And I'll also look into getting Red Snappers for this machine!)  What we did, though, I think worked great!

Now that my sister's wedding quilt is basted, I was able to start the quilting. This is my first large quilt to be quilted with my new sewing machine and I'm already appreciating the larger harp space! Here are some pictures of the quilting I finished yesterday. First the top, with a close-up:


And then the back:


Any white threads you see are the water-soluable basting threads. Another advantage of this method of basting is that the quilt is so much lighter without all of those pins. Of course, a downside is that I have to be very careful to make sure the quilts don't get wet before I get around to quilting them, but that's not generally much of a problem around here. I'll definitely be playing more with this method of basting! Oh yeah, for those who haven't seen this quilt before, I'm calling it Lake House Romance because my sister and her new husband spend a lot of time at his lake house.

When working on quilting a large quilt, I need to also have an easy piecing project on the side to work on when I've done too much quilting for my shoulders to handle or when I just need a break. So I got out my Wild Women Don't Get the Blues quilt. I started this quilt in a class with Karen K Stone that my friends and I took several years ago when we went to the Long Beach International Quilt Show for my 50th birthday. At that point, this was a new pattern for Karen that she hadn't published yet, but now I think it's available in one of her books. Here's an idea of what the blocks look like:


These paper-pieced triangles are easy to pick up and work on without any planning or thought, so they are a good fill-in project while quilting. I've got 57 triangles finished so far, but will need at least 100 triangles (depending on the size I want to make the final quilt) so I have a good ways to go.

And since football season has started up again, I've also picked up my hexagons quilt to work on while watching the Broncos games. This is a quilt that I started many years ago that I just keep chipping away at. It will hopefully be a charm quilt, although it gets difficult to be sure that you haven't repeated a fabric when you have so many of them. Here are the blocks I have completed:


There are 21 completed blocks in the box so far. The hexagons are the bigger ones -- 1 1/2" per side. Here are a few of the blocks laid out together:


I'm not sure how many I'll need for the quilt, but I'm sure I still have a ways to go. And if I make too many blocks, I can always make another quilt. I plan to make a queen-sized quilt, completely by hand. My current plan for the quilting is to do big-stitch quilting parallel to the sides (so 3 lines of quilting through each hexagon), maybe with black, white and gray pearl cotton in each direction. That's my current thought, but nothing is set in stone until I get to the point of actually doing the quilting.

Well, that's all I've been doing lately. I'll try to write posts regularly giving you updates on the quilting on Lake House Romance.

Nancy


Sunday, September 27, 2015

Let the Sun Shine -- Brackets, Feathers and Straight Lines

Hi all -

I've done some more quilting on my Let the Sun Shine quilt. I started off by quilting the brackets that I marked in my last post. I spent a bit of time trying to decide what thread to use. These are background areas so I want the quilting to be subtle, but I really like the designs I chose so I want the quilting to be visible. I know I want the lines to be thin, so I went to my standby background thread -- 100 wt silk. So I pulled out all of my silks and started looking at the colors. First I looked at blues. I didn't want to match the fabric color, so I looked at lighter and darker blues, but they were all too visible for my taste. I thought about grays, but they still looked too visible for me. Finally, I tried some greens and ended up choosing a dark khaki green. Not the color I expected to use, but I really like how it looks.

I stared with the brackets and the feathers in the middle. I'm better at shorter feathers, so this was going to be an easier area for me. I did all of these without breaking thread. Here's what it looked like on the back where you can see the quilting better:


Not perfect, but I'm still liking it. While I was in the groove, I went to the outer brackets and feathers. These feathers were more difficult for me because I needed the plumes to be long and thin:


I did better on these than I expected. The next part I wanted to add was the straight lines. I picked up Lisa Calle's longarm rulers for quilting 1/16" and 1/8" parallel straight lines and decided to give them a try with my new ruler foot. I love them and will definitely be getting the other widths! Here is how the center area turned out with the 1/6" lines:


And the outer area with the 1/8" lines:


 And a view of the whole thing on the back:


And on the front:


I think this quilting creates a really dramatic frame for the center of the quilt. It's subtle, yet visible. I'm very pleased.

I also worked on getting all of my class supplies together for Houston. It always seems like Houston is further away than it is, and I end up scrambling to get everything I need. This year, I have everything gathered and ready to go:


The only thing I didn't already have is some write-on transparencies which I've ordered from Amazon and will be here in a couple of days. So everything is in the suitcase, ready to go.

Fall colors have also come to the area. Here are a couple of pictures from my yard before it goes away and winter sets in:


Lance and Wesley came out to help me with my pictures:


Hope you're having a great fall!!

Nancy