Spring is finally here and I look forward to the warmer weather! It still looks like winter at my house since we had a blizzard a week and a half ago and got two feet of very dense snow. The weather had been mostly nice since then, with highs generally in the 40s, but it takes a long time for that much snow to melt. Here's what it looked like at my house yesterday:

We're supposed to have highs in the 50s next week so I look forward to seeing more of the ground and to our neighborhood roads widening a bit so cars can pass by each other a little easier, but I don't look forward to how muddy the roads will be! Oh well, it's good to have moisture anyway!
Yesterday a played a little bit with some free-motion couching on my Bernina. I bought the free-motion foot several years ago and played with it a bit since I got it, but then I put it away and never got around to getting it out again. But I've been seeing more and more of the free-motion couching on the longarms and I have some yarn that I didn't enjoy knitting with that I thought would be perfect for couching, so I decided to get everything out and play around a little bit. I've been picturing this yarn on a quilt for a while, but I'm not ready to start that so I decided to make a panel for a project bag instead. (I'm planning on playing around with a lot of techniques and using them in project bags, so hopefully this is just the beginning!) It took me a while to decide what I wanted to do, but I finally settled on a horizontal line of swirls. To start, I cut my fabric a little larger than the size I wanted for the panels and fused some fusible fleece on the back of each piece. I used a water-soluable marker to mark horizontal and vertical center lines, and then used a circle template to mark circles centered on the horizontal line. I loaded the foot, set everything up and couched the swirls:

This picture is in the same orientation as I did the couching. I started at the bottom and moved up, couching around the perimeter of the circle and swirling in to the center. I then just went straight up until I reached the next circle. These swirls were good for figuring out how the couching worked. Because the yarn didn't completely fill the hole in the foot and because the foot feeds the yarn in from the left-hand side, I found that the yarn didn't always want to catch on the lower left-hand side of the swirls. This makes sense because that's the location on the circle where the yarn is least likely to end up under the needle. In the above picture, you can see some thicker areas in the circle on those sides. Those are where I went back and forth with the couching to fill in areas that weren't caught in stitching. I was happy to see that these didn't stand out terribly. I also found that when I was starting a new swirl, it helped to stitch backwards a few stitches along the circle, and then start stitching the swirl to keep that transition sharp. When I didn't do that, the yarn pulled a bit to the right where the swirl began. Here are my finished panels:

I really like how these turned out and when I run my finger across the yarn everything feels secure. I just made these yesterday so I still need to make a project bag out of them, but I should have that finished by next time. I do think I want to play around with this couching some more!
I've also been working on my second Sue Spargo project bag, Birds on Parade. March Madness is going on right now and I'm finding that hand embroidery is a good pastime while watching games that I want to pay attention to, so I've been making progress on my embroidery projects. I was able to finish all of the hand embroidery in this pattern:

Here are close-ups of each of the birds so you can see the stitching better:


This has been a lot of fun! In the pattern, the back doesn't have any applique or embroidery on it. I've decided that I want to add some since you sometimes end up looking at the back side of the bag and because it seems a shame to waste this space when I could have some more fun here. So I ordered some wool felt so I can add something to the back. I'm thinking I'll put some flowers and leaves or some butterflies back there. I'll let you know what I decide!
Since I finished the Sue Spargo embroidery while March Madness was looming, I knew I needed to make another hand embroidery project so I would be ready for the games. I've been thinking for a while that I want to make a project bag out of some of the bundles of fabric strips I've been picking up at the Cherrywood booth at Houston for the last couple of years. Here's what the fabric bundles look like:

I've been picking these up because I want to make a Cherrywood string quilt at some point. But I also had started picturing a Cherrywood string-pieced project bag and decided that I had to start on one. I used a fusible fleece for the base and used sew-and-flip to add the strings. Then I added a 1-inch band across the bottom of the strips and then added the bag bottom, also using sew-and-flip. Then, my idea was to do a variety of hand embroidery stitches in the strings, using some Valdani perle cottons that I picked up a while ago that have the same earthy colors as the Cherrywood fabrics. Just as I was about to start the embroidery, I realized that I didn't want the embroidery to run all the way up to the zipper, so I added another 1-inch strip of fabric across the top of the panels. I did this after I had trimmed the panels so this was originally just a fabric layer. When I started the embroidery, the top strip kept flapping down and it started to fray, so I quickly added some interfacing to the back of the strip, added top stitching to the folds on the bands and also added a narrow zig-zag stitch to the top edge of the fabric. Everything is feeling a lot more secure now and I'm not seeing any more fraying.
Here's what each side of the bag looks like, along with close-ups of the stitching I've done so far:

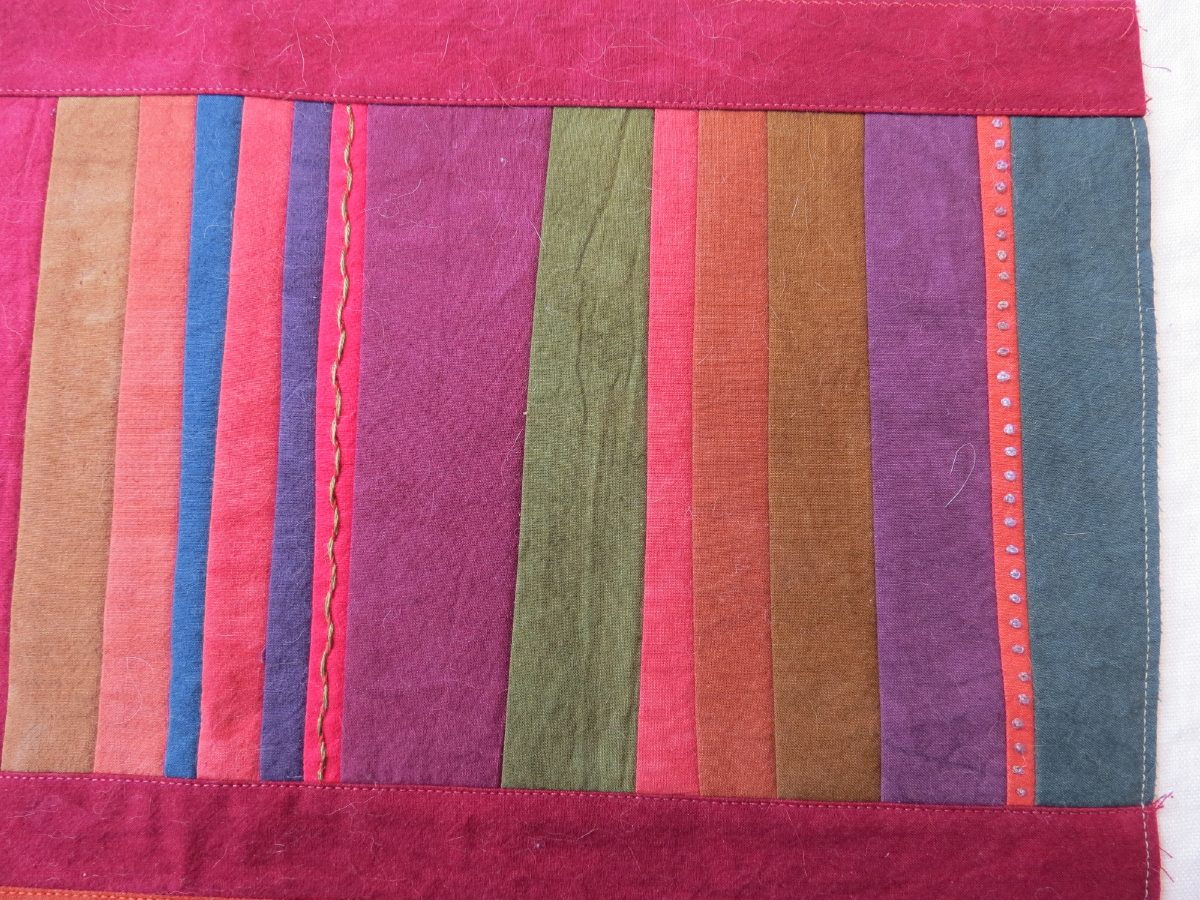

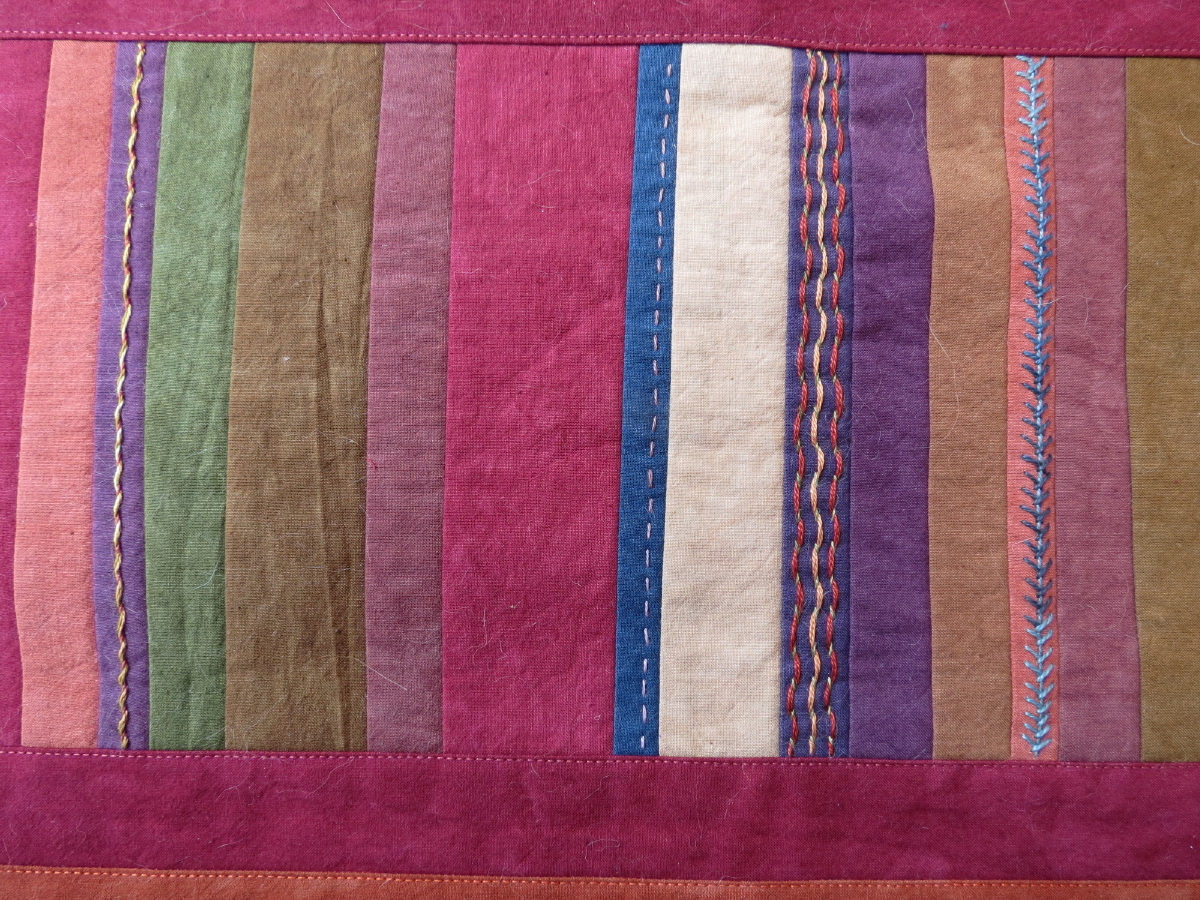
I'm really loving how these are looking so far! And I'm enjoying the embroidery. I wasn't sure how the Cherrywood fabric with the fusible fleece would needle, but it really sews easily. Which is good since there's a lot more stitching to do on this bag!
I've also been doing some knitting. We received our final installment of the Moxie cowl, so I got that knitted up:


I was hoping to get it blocked and get the ends sewn together before this blog post, but I'm really good at procrastinating when it comes to blocking my knitting. But I did get it in the bath today and it's upstairs blocking now, so hopefully it'll be completely finished by my next blog post!
I also got back to my Baby Novus sweater. I had been having a bunch of trouble with the gauge so I had put it aside so I could think about it for a while. I generally have to deal with problems by stepping away and letting myself think about it and make my decisions while working on something else. I decided that it wasn't worth it to stress over the gauge and just moved up to the 6-9 month size and now I've made some progress:

This sweater has an interesting construction. You start on the bottom of the right arm and knit the right side of the sweater. Then you start at the bottom of the left arm and knit the left side of the sweater. For these sides, the knitting stitches sit sideways from what you normally see. Then you knit the back panel, attaching it to the sides as you knit. Then it's the side panels that finish the sides and sleeves as you knit. Finally, there's an I-cord edging that ends in some I-cord that creates a tie to close the sweater. So there's no seaming at the end. I just have the back and side panels and the I-cord to finish this up. I hope to get that done in the next week.
Finally, while I was taking a hiatus from the Baby Novus sweater, the March Lola's Choice kit arrived.

(I'm having fun using my other Sue Spargo project bag for this project!) This month's kit is for the Ironish scarf, by Laura Nelkin. This scarf uses a really cool stitch called the Iron stitch. I assume this is a stitch that Laura made up, but I'm not sure. And, to add to the fun, some of the Iron stitches are beaded. Here's what the stitch looks like:

Isn't that pretty? The scarf is gray on the ends, where it tapers to a point, and is pink in the middle where the Iron stitches are incorporated with some lace. I'm about half-way done with this scarf:


Isn't that pretty? I just love the colors and can't wait to get back to this project!
Well, that's about it for now. I hope to have some finishes and maybe a few new fun projects for next time.
Nancy
No comments:
Post a Comment