The next step on my sister's wedding quilt is to quilt the feathered hearts, but I'm still trying to decide how to do the marking. I know I'm going to mark the design on some sort of paper and then quilt through that, but I have to figure out which paper will work the best. I had heard about using deli paper so I wanted to give that a try. So, obviously, it was time to work on a new project. (Sure wish I knew how to put a smiley face in here!) I decided to make a fabric hexagon tray like the one in this tutorial, but I changed it up a bit by adding a complex quilting design since I wanted to test how well the deli paper could be removed from a complex design.
I started off by looking for my quilting design. I would use this to decide how big to make the tray. I pulled out one of my Dover books and found a design I liked. I printed the design out so that it was 5" across so I could make my pattern from there:

The inner straight lines will be the stitching around the edge of the bottom. I drew those lines by measuring 1/4" from the design and keeping my ruler's 60 degree line on the previously drawn line. This should give me something close to a perfect hexagon. The outer line is the cutting line and is 1-1/4" from the inner line so that I'll have 1" sides on the tray when using a 1/4" seam allowance.
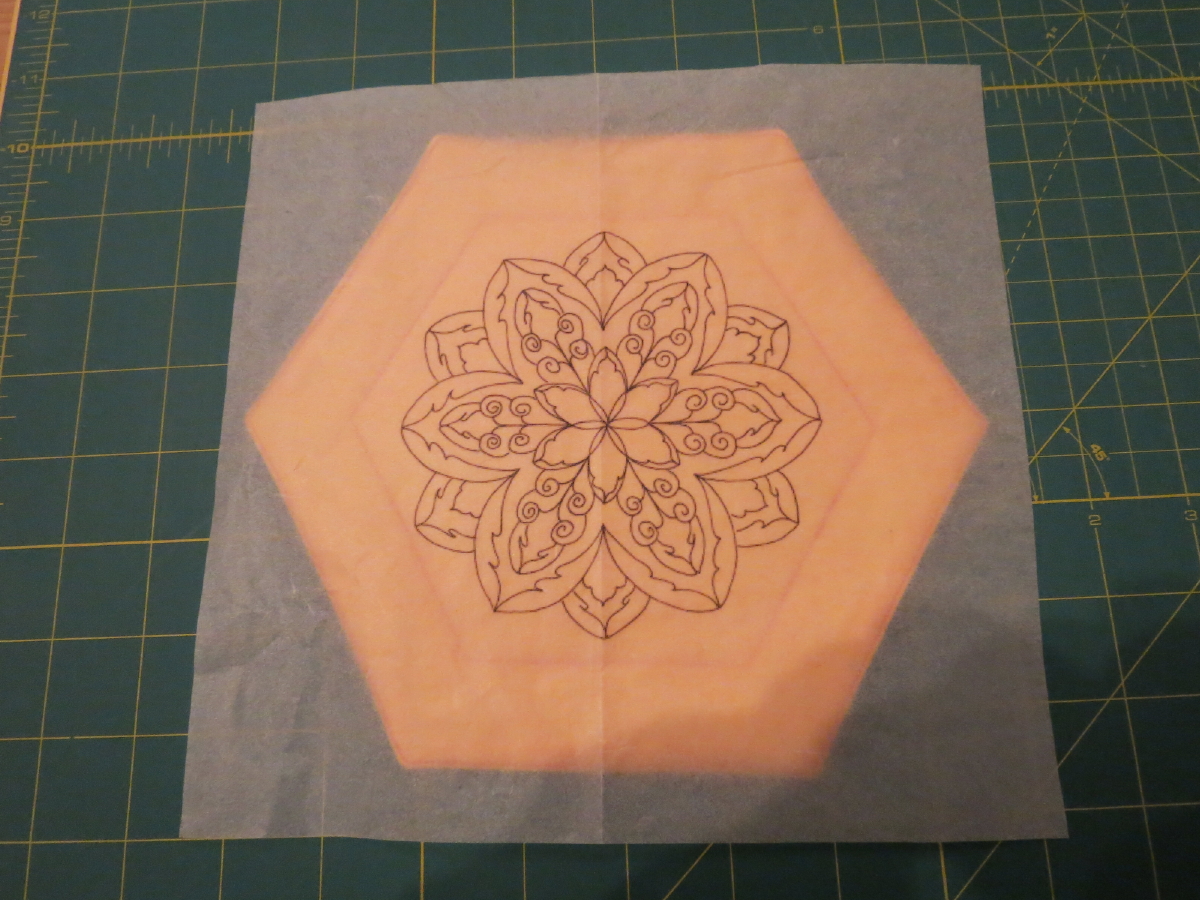
Now I needed to make my quilting pattern. I taped some deli paper over my paper pattern and printed the quilting pattern directly on the deli paper using my printer. I wanted to see how the printer ink would work for this, even though I'll be drawing the design by hand for my sister's quilt. This worked really well:

Next I cut on the outer line and used the pattern to cut my fabric and batting. I layered the pieces in the order they needed to be in for sewing:

I used my flat-head pins so I could cut everything using a rotary cutter without having to deal with the ruler wobbling:

I really love the flat-head pins for this!
Now it was a simple matter of sewing around the edge, leaving an opening for turning everything right side out. sewing up the tray using the instructions in the tutorial:

Sorry I didn't get a picture with just the quilting around the edge of the bottom, but you can see where that quilting goes. I decided to try using temporary basting spray to attach the quilting pattern to the tray rather than using pins. That worked really well, too, although this is a small design so I'm not sure if it would have worked with something larger:
Now I just had to stitch on the lines. One thing I discovered really quickly was that it was hard to grip on the deli paper and I had to trim it off around the edges so I could hold onto the fabric while quilting. But the paper held up really well with the quilting:

A couple of years ago I had used the Golden Threads paper to quilt Kansas Jayhawks on a quilt. The quilting came out great, but I had a lot of trouble with the paper tearing along the quilting lines as I was quilting. The deli paper held up really well. But, of course, that might mean that the deli paper is more difficult to remove. The bigger pieces of the deli paper came out easily:

But I did have trouble at the points where there was a lot of thread build-up:
You can see it better in this close-up:

I worked some more at the small pieces, then put it in the washing machine to see if that would help remove the paper:

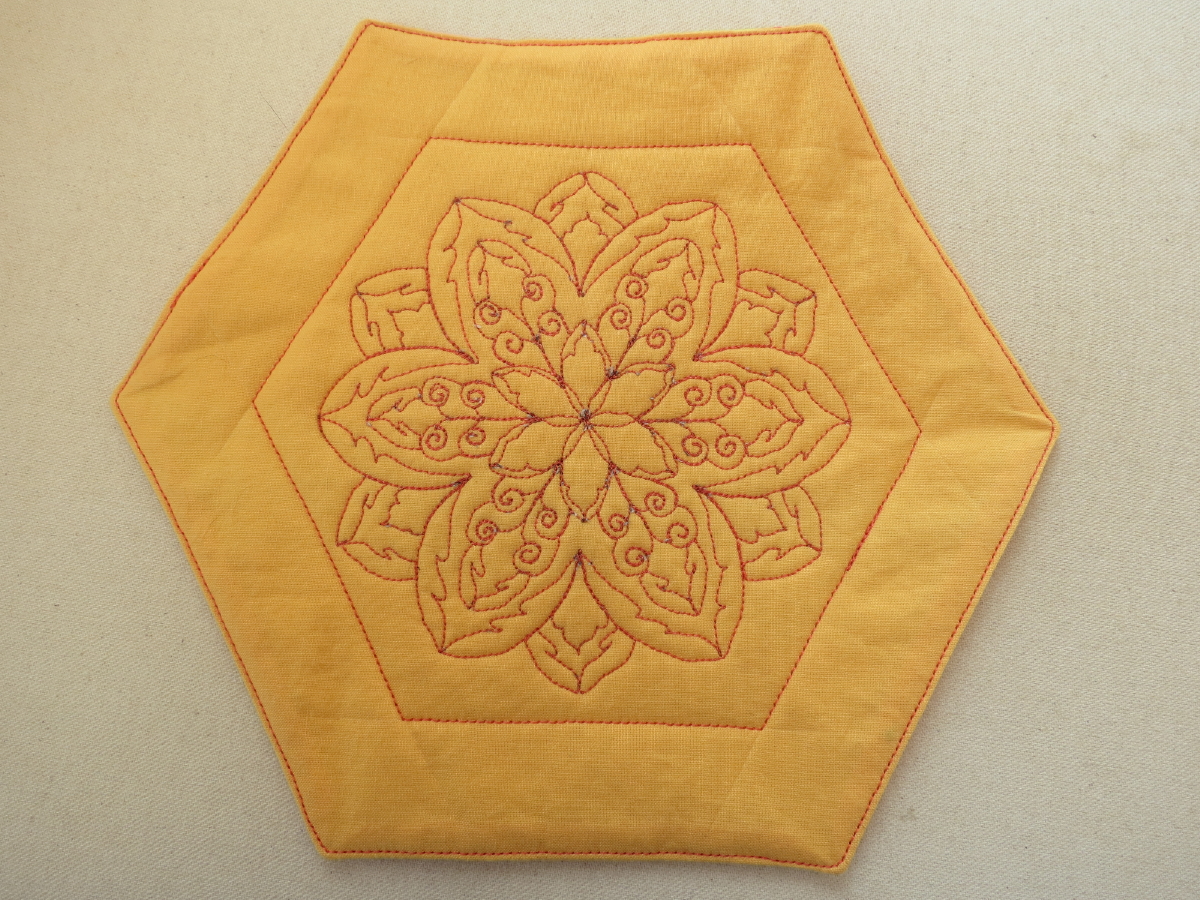
I was able to get some more of the paper out while it was wet, but still couldn't get it all. I also got some of the printer ink on the piece, which I kind of expected would happen, so I'll have to do some more experimentation before using the printer to transfer the quilting pattern in this technique. But I still do like how the tray turned out:


What are my conclusions? I think the deli paper works well enough to use it on my sister's quilt, as long as I use a temporary marker for doing the marking. But I might do another test with water-soluable stabilizer to see if I want to use that instead. Another product I'll probably try is Glad Press-n-Seal. I've heard that works well, but I'll need to see how it comes out of the tight corners since that definitely won't come out with washing.
I do still have some more Houston posts coming, but I wanted to document this little project before I forgot the details.
Nancy
Nancy, What a cute hexagon tray! Where did you find the deli paper? I haven't tried it; but I might after reading this blog! --Terry
ReplyDeleteThanks! I found the deli paper on Amazon. This is the one that I bought: http://www.amazon.com/gp/product/B00KLEWZ2Q?keywords=deli%20paper&qid=1447035093&ref_=sr_1_4&sr=8-4. If I remember right, the Craftsy teacher that recommended it said it needed to be the dry waxed kind.
DeleteThis comment has been removed by the author.
ReplyDeleteWow your quilting is amazing. Thank you for describing the process. I heard you get the paper with donuts what an excuse
ReplyDeleteWendy
I'll do anything for a donut.....
Delete