Saturday, January 24, 2015

Heart-Filled Pillow

Hi all -

This week I've been working on my January entry for QuiltShopGal's 2015 Free-Motion Quilting Challenge. For this challenge, we needed to make something with a heart for Valentine's Day. There were 3 options and I chose the one with feathers filling the heart.

I decided to use Dupioni silk for the heart since I just love the shine of silk. Luscious! And I decided to use a double batting -- Quilter's Dream wool on top with Warm and Natural cotton on the bottom. The wool gives it a wonderful puff and the cotton gives it some stability. I ironed a piece of fusible light weight interfacing on the back of the silk to stabilize it and then sewed on some borders to frame the heart.

To draw the heart, I got out a piece of tracing paper bigger than I wanted for the heart. I folded it in half to get a center line and then used my flexible curve to draw a nice, smooth half-heart shape. Then I just folded the paper on that center line and traced the shape to the other side. This was the first time I've drawn a heart this way. It worked really well and I'm very pleased with the results. I then traced the heart onto the silk with a blue erasable marker and drew the spines for the feathers free-hand. I thought about just sewing the spines free-hand, but I decided that this would be safer and give me more even spacing on the feathers.

Then it was time to quilt the heart. When finished, I removed the blue lines with Blue Line Eraser. This product erases the lines immediately (unlike water where you have to soak it or the lines keep coming back) and doesn't stain, even on silk. Here is the quilted heart:


It looks pretty good from a distance. Here it is a bit closer:


I like my feathers on the outside curves, but need to work on the inside curve feathers. I can never figure out how to fit the plumes nicely in those areas so I need to look at some more books to see how others do it. Luckily, the feathers I don't like get lost in the design so I still like it.

Now onto the background quilting. To highlight the heart a bit more, I echoed around it in the fuchsia thread then again in the fine silk thread. Then, to stabilize the quilting, I ditched around the border and echoed that in the silk thread. Now I had to pick a background fill. That's always hard for me. I hem and haw until I finally just force myself to get started. I decided to make up a background fill for this one (although I'm sure others have used this, too). I wanted curvy lines to control puckers since the background was so puffy. I wanted something to contrast with the feathers, so I decided to use curvy lines to divide the background into sections, then fill each section with lines parallel to one side of the shape. Here's how it looked while I was quilting it:


I think it's so cool to see how the quilting controls the puff as I go along! And I didn't get a single pucker on the front. This is ridiculously dense quilting. The lines are about 1/32" to 1/16" apart. But boy is it flat! Here is a picture showing the background quilting design:


I love how this background fill turned out! The curvy parallel lines give it a McTavishing look, but it has a griddy look that gives it good contrast to the feathers. Finally, I just quilted echo lines around the border and finished the pillow:


I just need to get a pillow form and I'll be done. I put a zipper on the back because I like that better than an envelope finish for a pillow. I find that with an envelope finish the pillow form keeps popping out of the back of the pillow. Maybe I'm too rough with my pillows!

On a non-quilting note, I thought I'd share the friend we met on our walk yesterday:


Can you see her hiding behind that bush on the other side of the stream? It's a female moose enjoying the morning solitude. I never would have seen her if Lance (my dog) hadn't pointer her out to me. He stopped on the trail and just stood there quietly staring at her. He does this stop and stare thing all the time and there's never anything there so I ignored him at first. But this time he kept staring a lot longer than usual so I looked over and there she was. Thank you, Lance! Both for pointing her out to me and for being a polite boy and not chasing her! (Moose are known to attack dogs without provocation, so I was very glad that both of them decided to just stare!)

That's all I have for now. I hope you are all having a great week!

Nancy

Sunday, January 18, 2015

Grand Illusion Progress

Hi all -

It's been slow, but I've made some progress on my Grand Illusion quilt. I now have the main part of the top pieced and just have to add the borders. Here it is so far:


(Wesley was kind enough to help me with my pictures.) It took me a while to get this put together because I was hemming and hawing about how to lay out the blocks. I just don't have a space big enough to lay out a quilt this large and I wasn't sure how I wanted to position the blocks. It's very subtle, but the pink stars have a 4-patch block in the center that makes the blocks asymmetrical. So I had to decide how I wanted to rotate each block. To give myself a large design wall, what I finally decided to do was sew together two picnic tablecloths and then lay it on the kitchen floor. That way I could lay out the blocks and roll up the side that didn't fit on the floor. Here's what it looked like while I was sewing the blocks into rows:


It wasn't the ideal design wall, but it worked well enough and I was able to get everything sewed together in the orientations that I wanted. And if I was working on a quilt that I needed to put away for a while, I could just fold the whole thing up and not lose the layout.

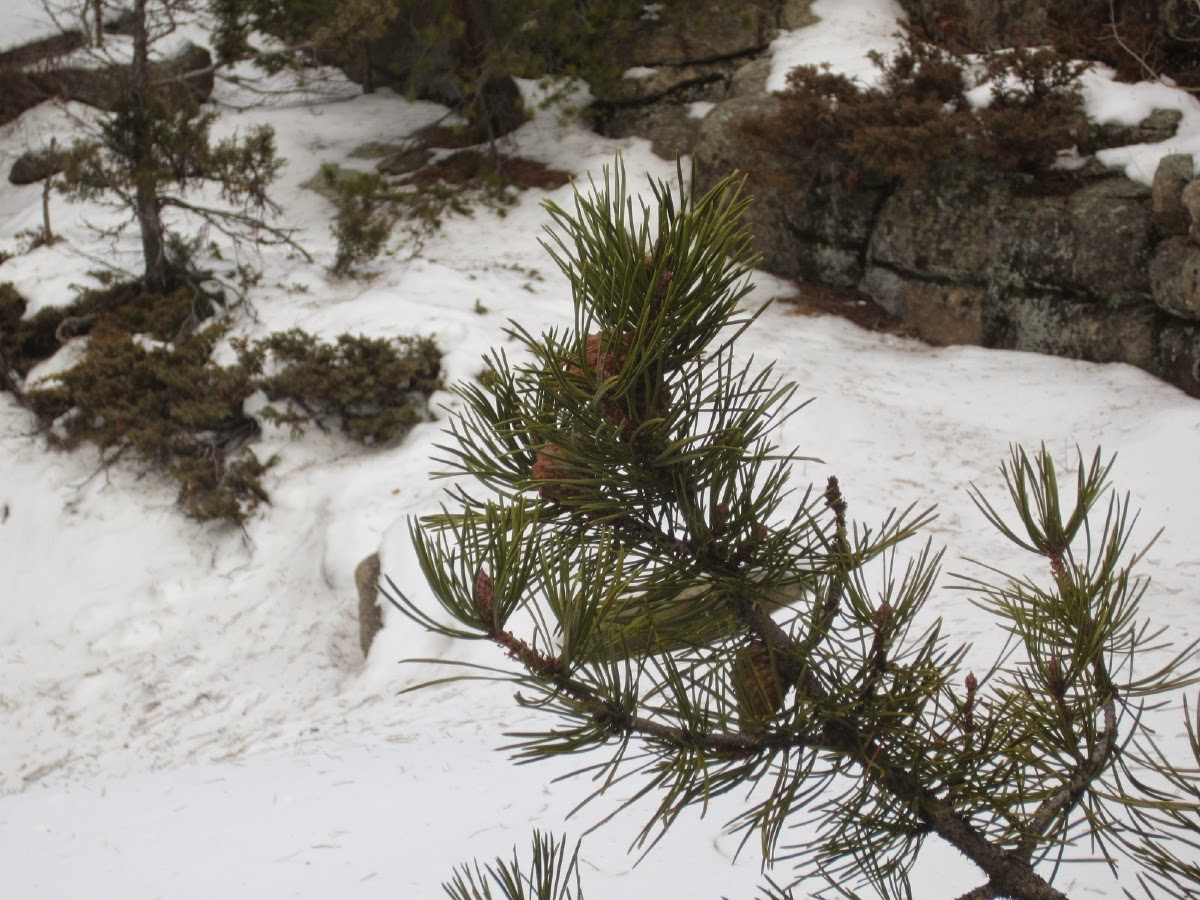
We had some cold, foggy days last week. Not pleasant for driving, but it put some beautiful frost on the trees. Don't the pine cones look cool?


Finally, I thought I'd share a new book that I just bought. It's Applique Mastery by Philippa Naylor:


As soon as I saw it, I knew I had to have it! Connecting Threads is having their 40% off books sale, so I was able to pick it up there. I haven't read the whole book yet, but I've looked through it and read pieces and it's wonderful. In this book, Philippa not only gives the pattern for the cover quilt, which I saw in Houston last year and it is amazing, but she also shares a bunch of her techniques, even ones not used in this quilt. I read her instructions for her method of turned-edge applique, and they were very clear and detailed with good pictures illustrating the technique. She also shares her edge finishing techniques, which is the class that I took from her in Houston a couple of years ago and loved. I look forward to reading all of it! I'm not sure when I'll have time to try everything, but at least I have the book so I can always find the information when I need it.

Well, that's it for now. Even though I'm so close to finishing the Grand Illusion top, I think I'll put it aside for a little while since it was starting to bog me down. I want to do the QuiltShopGal (formerly SewCalGal) FMQ challenge this year, so I think I'll start on that tomorrow. I don't want to get behind in the first month!

Nancy

Tuesday, January 6, 2015

Grand Illusion, Parts 4 & 5

Hi all -

After a marathon week of sewing, I've finished up through part 5 of the Bonnie Hunter Grand Illusion Mystery quilt. That completes all of the units and I've just started on the final clue which sews the units together into blocks, sashings and borders, and, finally, into the completed quilt top. I can't believe the clues are done already!! I thought I should post my progress so I could join this week's link-up.

In my last post, I was still only part way through part 3. Here are the completed units. I like to lay all of the units out on the kitchen floor. You never know when that'll inspire another quilt!


And here are the part 4 units. I LOVE how these look together and can see doing another quilt like this.


And, finally, part 5. This was an easy part to give us a chance to do some catch-up before assembling the quilt.


Now to put it all together.....

I thought I would also share some pictures of our dog walk this morning. We have to go early in the morning to avoid seeing anyone else because Lance is afraid of people and he'll bark at them if we see anyone. But it's nice to be able to enjoy the great outdoors together!


And Lance found a deer bone on the trail that he really enjoyed:


I do love living in the Rocky Mountains!

Nancy

My Sister's Wedding

Hi all -

It's a bit late, but I finally downloaded some pictures of my sister Sue's wedding. The ceremony was in the evening on Dec 13. It might seem odd to be married on the 13th, but she wanted a memorable date so was happy to get 12-13-14. We sure won't forget it!

Since it was a second marriage for both of them, they had a small ceremony at a bed & breakfast near home. It was only family and they rented the whole B&B for the night so we had the whole place to ourselves and those who were drinking could stay overnight. It was very nice!

Here is Sue with her bridesmaids. On the left is her husband Greg's daughter, Kelly. And on the right are her daughters Kelsey and Lindsey.


And the whole wedding party. Next to Sue are Greg's kids -- you've already met Kelly and I don't remember his son's name. Terrible, I know, but I've only met him a couple of times and I'm terrible with names! Next to Greg are Sue's kids. Trevor is her son's name. Aren't they a beautiful family?


After taking pictures outside, they had the ceremony inside. I wasn't in a good spot for pictures, but this gives you an idea of how nice it was.


And you can't have a wedding without a quilt, right? Here we are all around after they opened the quilt top I made for them. I only gave them a quilt top for the wedding since I wasn't told about it until August. They'll get the rest of the quilt for Christmas next year.


From the left we have Terra (my other sister's daughter), Trevor, Lindsey, Sue, myself and Greg.

I really like Greg and his family. They are all kind and considerate people. I hope they will be happy together forever!

Nancy


Thursday, January 1, 2015

Grand Illusion Mystery, Part 3

Hi all -

Sorry for the disappearance. I went to Kansas City for my sister's wedding and to celebrate Christmas, and I just didn't have time to post anything. I'll post some pictures of my sister's wedding later, but right now I need to get a blog post together for the Bonnie Hunter link-up.

But first, I have to share some cute Christmas pictures. One of the best parts of Christmas is being able to humiliate Lance. This year, I got him a cute elf hat to wear. Can you tell how much he loves it????

My Cute Little Elf
And here he is, posing with his cousins:

Lance wth Vada, Brutus and Winnie
Lance had a little more patience with the cameras than the others did....

And now on to the Grand Illusion quilt. I wasn't able to do any sewing while I was in Kansas City, so I've just started back on it this week. Whew, I've got a lot to do to catch up! But I'm plugging away and will, hopefully, finish it soon. I did get part 2 finished. Here are the blocks, laid out nicely on the kitchen floor:

Part 2 Blocks
I used the sew-and-flip method for making these blocks, so I also have a bunch of bonus blocks to use either in this quilt or in another:

Bonus Blocks
These will be fun to use at some point!

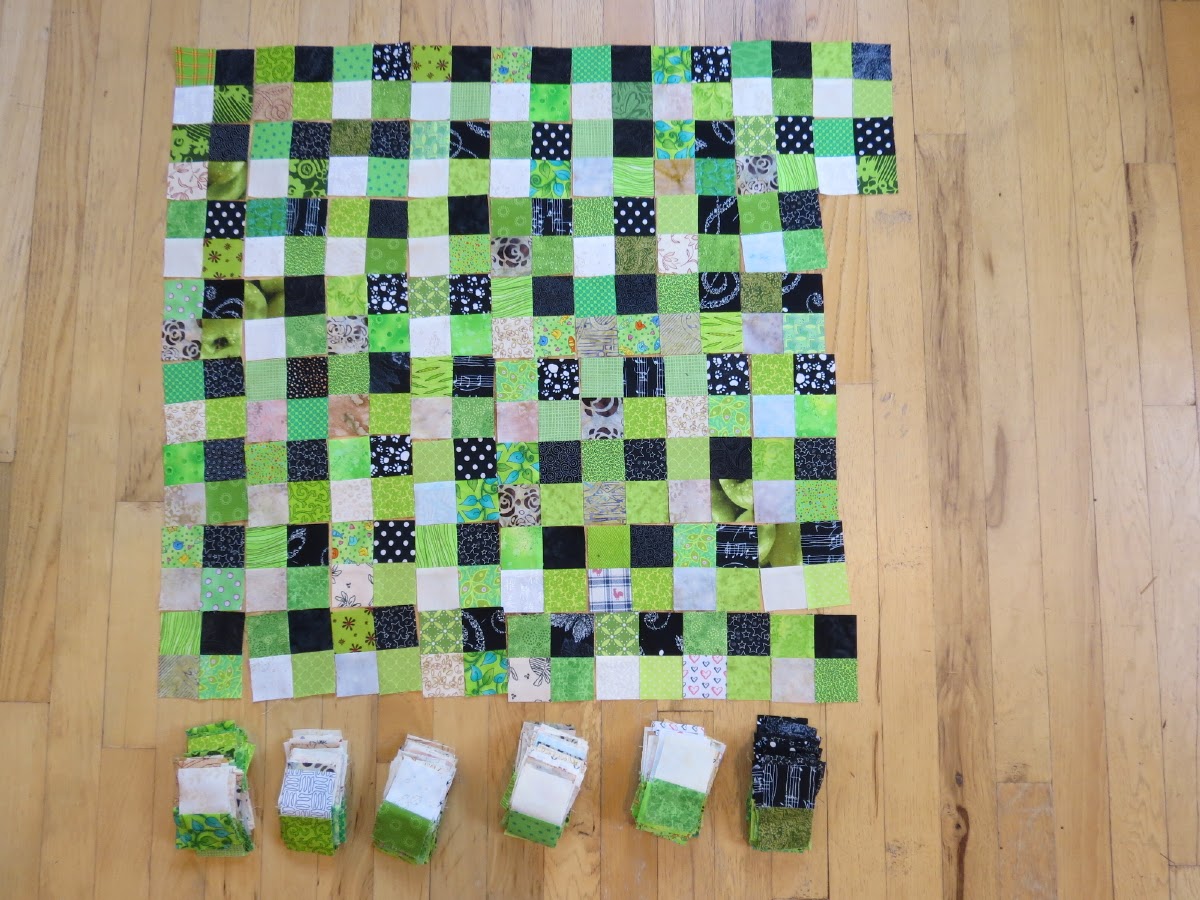
I've also started on part 3. I'm a glutton for punishment, so when I do a scrap quilt I don't do any strip piecing. I like to have the maximum scrappiness possible, so I cut each square individually and keep mixing up the fabrics as I sew the pieces together. Well, there are a lot of pieces for these blocks! But I have all of the cutting done (if I counted right) and am making some progress on the blocks. Here's what I have so far:


I hope to have these blocks done tomorrow, but the link-up deadline is today so I'm posting my current progress.

I hope everyone had a very Merry Christmas and a wonderful New Year!!

Nancy

Tuesday, December 9, 2014

Grand Illusion Mystery Part 2

Hi all -

Well, it's time for the Grand Illusion Mystery part 2 link-up, but I'm not quilt finished with this week's clue.  Here's what I have so far:


The units you see at the bottom, although these aren't sewed together yet, are the final units for this week. I'm using the sew-and-flip method for making the rectangular units. It's more time-consuming, but that's just more accurate for me. And I love having the bonus half-square triangle units you see in the picture. These aren't part of this quilt, but will be useful in another quilt or if I decide that this quilt needs an additional border. I have about half of the rectangular units done (there are 200 of these, to make 100 squares), and then will need to sew these together into square. But I won't have access to my sewing machine until after Christmas, so I'll have to catch up then. Looking forward to it!!

I also finished the last of my Christmas presents:


These are for my two sisters. They are made from some of my mom's linens. I believe these were those cloths that they used to put on the arms of chairs. These are handmade and I'm assuming they were made by my mom, but don't know for sure. The pictures are of my mom and her sister when they were toddlers, around 1929. Here's a close-up of the one for my sister, Sue:


And the one for Linda:


Here's a better shot of my quilting:


And here's the back of Sue's:


I did write the names of my mom and her sister on the backs after I took the pictures, so all of the information is recorded. I really love how they turned out and think my sister's will be thrilled!

That finishes my Christmas shopping and sewing and wrapping, and just in time since I leave tomorrow to go home. My sister Sue is getting married on Saturday, so I'm staying through Christmas to save me a bunch of driving.

Happy Quilting!

Nancy

Wednesday, December 3, 2014

Christmas Presents

Hi all -

Whew, have I been working hard trying to get ready for Christmas! I've felt like one of Santa's elves, but the finish line is in sight. Good thing, since my deadline is next week, when I drive to Kansas City for my sister's wedding and stay until after Christmas.

I've finished some really fun stuff. The first is a table runner for my niece, Terra. This was a kit that I picked up at the Keepsake Quilting virtual warehouse sale. Got to love sales!! And I just love this pattern! It's Merry-Go-Round by Atkinson Designs. I had already shared the pieced top, but now it's quilted and bound and ready to go.


I love the clean look of this quilt. The fabrics from the kit really appeal to me and I'll probably make another one of these sometime in the future.  In the center, I decided to use McTavishing:


I love the movement that McTavishing provides! On the edges I decided to play with straight lines. I've been wanting to try matchstick quilting, so I threw that in here:


And the backing is scrappy, which I always love:


The next table topper I made was from the Prairie Flower pattern by Marjorie Rhine of Quilt Design Northwest. This one will be for my sister, Linda. Again, it was a sale kit from Keepsake Quilting and I had shared the pieced and appliqued top earlier, but now the quilt is finished. It really is a stunning design!


You can't really see the quilting very well on the front, even in person, but I used matching thread in the bobbin so the back would be fun, too.


I love to quilt feathers, so I used those in the "flower" areas. I also love to quilt leaves, so those went in. Then I was a bit stumped, so I decided to add lines to contrast with the feathers.


I marked the lines in the diamonds to make sure that they would be perfect. When I try to do something like that without marking, everything is just so uneven that I don't like it. You can see that in the curved lines in the corners. Marking takes some extra time, but I really think it's worth it!


Once the table toppers were finished, I moved on to some zipper bags for my other sister, Sue. These are from the Stash & Dash Bags pattern by Amy Butler. These bags started with the fabric. I found this Paris fabric at a vendor booth at the Rocky Mountain Quilt Festival. I had to get it for my sister because her fiance proposed to her on the Eiffel Tower last spring. Then I just had to figure out what to make out of this fabric, and these bags seemed perfect.


Here is a close-up of the largest bag so you can see the fabric a bit better. See the Eiffel Towers all over it?

Of course, I bought a yard or two of this fabric and have a bunch left over, so she'll have some more Eiffel Tower gifts in her future.....

Another thing that seems to be the craze lately is infinity scarves, so I decided to make these for my sisters and nieces. While in Houston, I stopped by the SewBatik booth to pick up some rayon batiks. I had seen some sewing program on TV that made mobius scarves (infinity scarves sewn together with a twist) and had the opening for turning on one of the long sides, so this is what I wanted to do. I looked around online to find the instructions, but it seemed like everything I found wanted to put the opening in the short seam where you connect the ends and I didn't want to put it there. Finally, I found this video that showed me how to do exactly what I wanted to do:

https://www.youtube.com/watch?v=euLZPZCahKI

And here are the 5 scarves I ended up making:


The rayon really has a nice drape! Lance was nice enough to model one of the scarves for you:


He's such a cutie!!

The only things I have left to finish are a couple of really small quilts for my sisters made out of some old linens of my mom's. The linens are those little things that they used to put on the arms of chairs. It's kind of cool that I can give matching quilts to my sisters! They are turning out really cool, but I still have some quilting to finish on them so I'll share them when they're done.  I think you'll really like them!

It's been a lot of fun working on all of these things, but I'm pretty excited to be almost finished. And the next clue for Bonnie Hunter's mystery quilt will come out on Friday, so I'll be pretty busy this weekend! But that'll mean more to share on Monday (hopefully)....

Happy Quilting!

Nancy