I'm back from another overwhelmingly wonderful trip to the Houston International Quilt Festival! As usual, I took full advantage of everything the festival had to offer. As I've been doing the last couple of years, I flew out on the Sunday before classes started and flew back yesterday, the day after the festival closed. I ended up taking fewer classes this year than I had in the past, which left more time for enjoying the quilts and chatting with friends. I finally got a smart phone the week before the trip, which made communicating with friends much, much easier! By next year I should be used to the phone enough that I'll even remember to take selfies with my friends so I can share them with you! We have to take these things one step at a time.....
I thought I would start my Houston blog posts with a report on the classes that I took to give myself more time to go through the quilt pictures to pick which ones to share. I have several thousand pictures, so this is no small task!
Realistic Thread Painting with Pam Holland
My first class was a full day class with Pam Holland, one of my favorite teachers and quilt artists. I've taken classes with her for several years now and I've loved every one of them! This class was no different. This was the class sample for the class:

And a close-up to show the thread details:

Isn't the detail incredible? For her technique, Pam prints the photo on fabric and uses that as the base for the thread painting. This really helps when figuring out what to do where. By the end, you've completely covered the photo so all you see is the thread.
Pam also brought the samples that she created for her Craftsy class that also teaches this technique, Thread-Painting Essentials: Photorealistic Quilts. This is the picture of her grandson from the class:


And the picture of the moccasins:

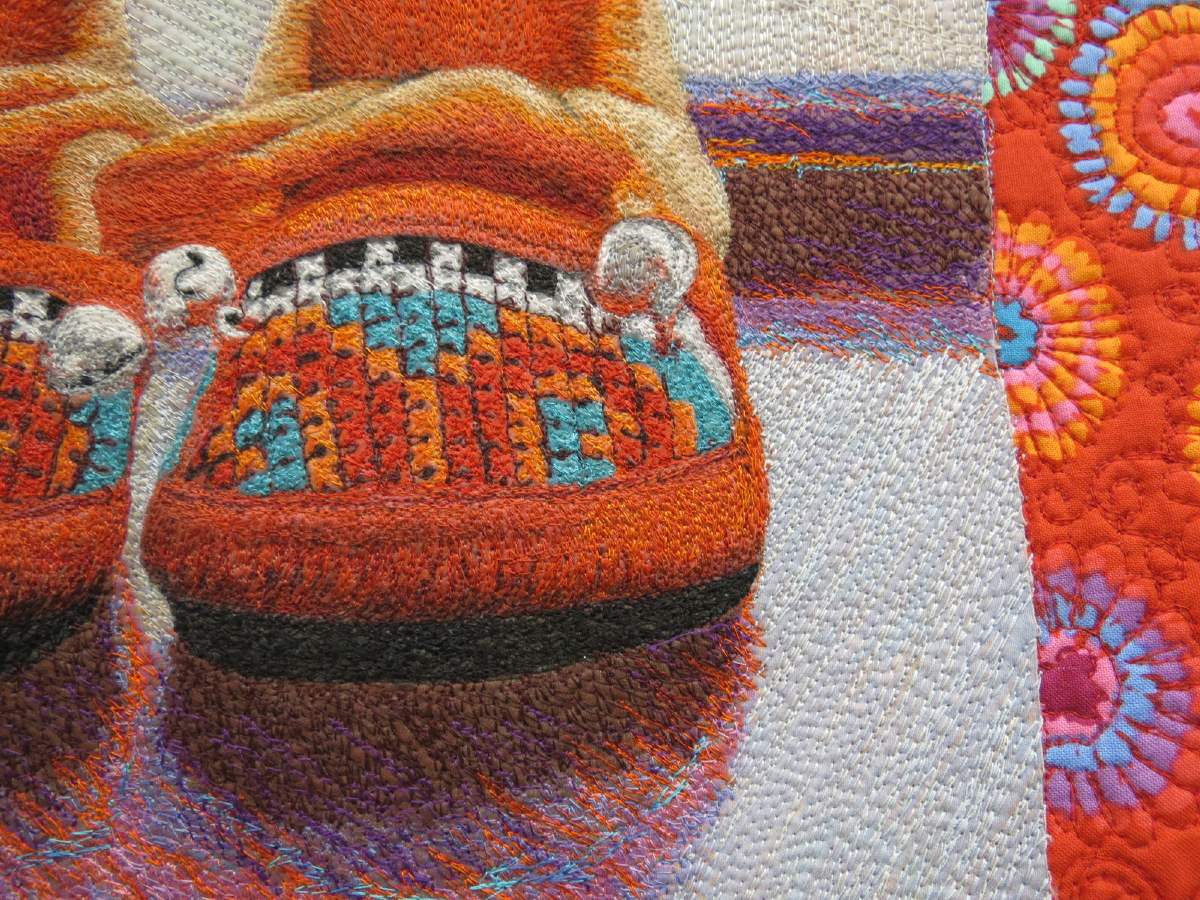
I love how this looks! I had watched the Craftsy class before Houston, but hadn't tried the technique yet. I think the Craftsy class is great and I would have been happy with just that, but having Pam's help in person is priceless!
Here are a few more samples of the technique that she brought to class:


I think you can see that the underlying picture doesn't have to be a photograph and the thread colors you use don't have to be realistic. You can really have fun with this!
Here is what I was able to do in class:

I've just covered the eyes, nose and forehead with thread so far:

I'm blown away by how intense this looks! This was done with just 3 colors of thread and a little bit of shading with two Fabrico markers. This is a project I really want to finish and I really want to try this with photos of my pets!
Free Motion Quilting -- Adding Text with Ana Buzzalino
My Monday night class was about quilting with text. Honestly, I wasn't expecting much from this class since I feel like I can free motion quilt just about anything, but I wanted to have something to do on Monday night. The class actually ended up being wonderful! Ana Buzzalino is an art quilter who makes some pretty cool stuff:

(Not the best picture of her, but it's nice to put a face to the name.) Here are some of her samples for the class:


You can see that she uses text in different, often subtle, ways in her art quilts. And there are often images that are the focal points of the quilts. That's where the surprise came in, at least for me. We started the class not with the text, but with the images. The material kit she gave us included alcohol pens that are used to transfer images from black-and-white toner prints onto fabric. She also brought images printed on Transfer Artist Paper that we could try, if we wanted. I opted for the Transfer Artist Paper since I can try the alcohol pen at home. I chose a swirly image that I colored with a pink Sharpie marker before transferring it to the fabric. Here's my class sample so far:

I had a lot more fun in this class than I expected and I'm really glad I took it! And, as an added bonus, Hobbs gave these batting sample sets to Ana to give to us:

The set includes an 18"x18" piece of every kind of batting that Hobbs makes, so a good size for me to actually try out the battings and see how I like them. Yea!!
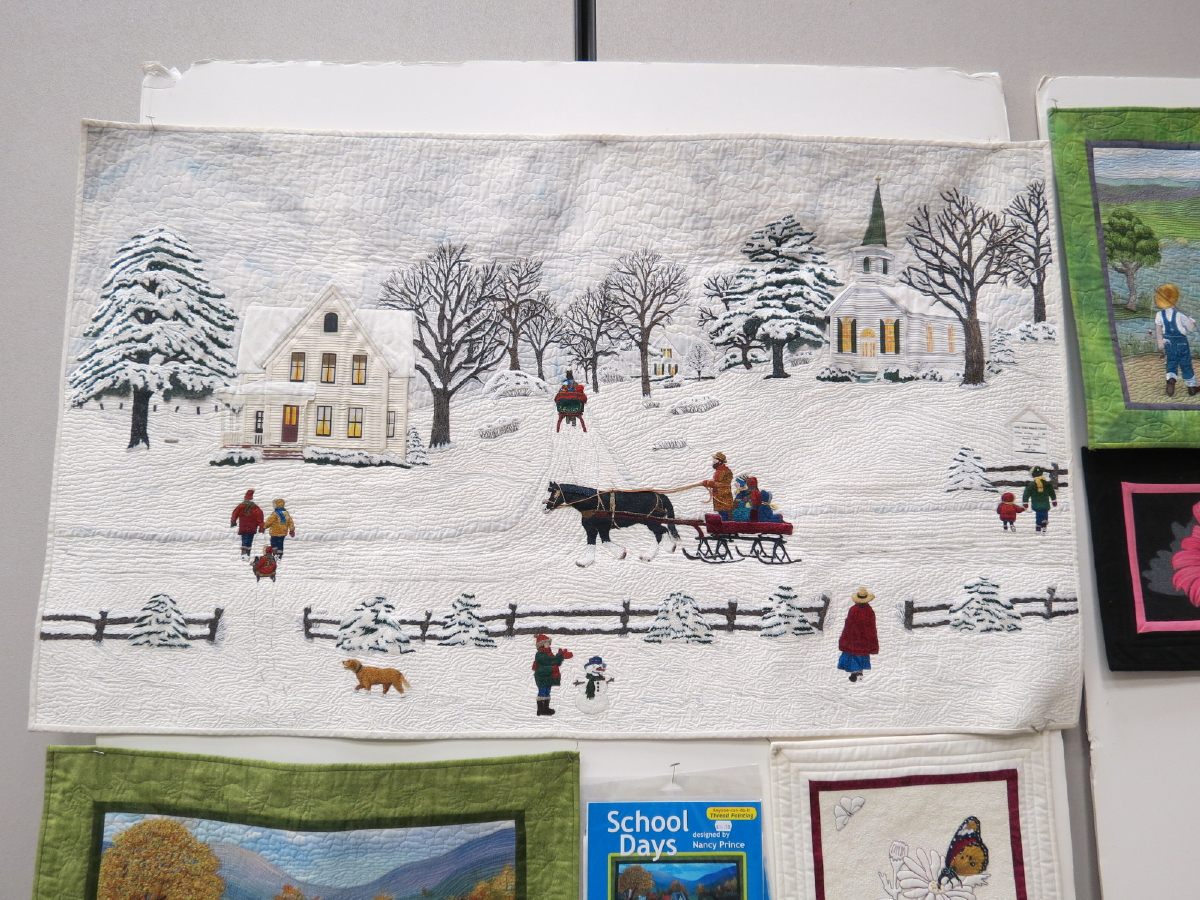
Enhancing a Photograph Through Thread Sketching with Nancy Prince
On Tuesday, I took an all-day thread sketching class with Nancy Prince:

Nancy is mostly known for her thread-painted figures that are constructed off of the quilt and then appliqued in place, like you see in these pieces:

The technique for this class is a bit of a departure from her thread-painting method. For this class, you put the thread on top of a photograph, like we did in Pam's class, but you are sketching with the thread so you leave some of the photograph showing through and lay down less thread. Nancy works in a hoop, thread sketching on the quilt top, then creates the quilt sandwich for quilting, which hides the back of the thread sketching inside the quilt. Here is her class sample:

And here is what I finished in class. I got her face done, but still need to work on her body:

I love how this one looks, too, although I probably used a bit too much thread to call it sketching. Here's a close-up so you can see what I did:

Both Pam and Nancy printed their photographs using Spoonflower, a service where you can design your own fabric. I've been wanting to play with Spoonflower, so I was happy to get a book of fabric samples in Nancy's class:

The little sample book contains a swath of every fabric they can print on, including samples of the wallpaper and wrapping paper you can create. This will be really useful!
That's probably enough for now. I'll tell you about the rest of the classes that I took in another post. I hope you find this useful!
Nancy
Glad you enjoyed the classes that you took. Looking forward to further reports from your Houston trip.
ReplyDeleteThanks! I should get the next blog post out this weekend.
DeleteNancy - Nice to see your class pictures. I too am looking forward to seeing quilt pictures and hearing more about your trip. Barb
ReplyDeleteThanks! It was a lot of fun!!
DeleteWow. I love all of the classes. Your projects are wonderful...especially the little doggie face! It's precious. Thank you for sharing.
ReplyDeleteThanks! That doggie really is pretty cute.
DeleteWhat interesting classes! How especially fun to have Pam Holland as an instructor! Looks like your tool box is overflowing with extra special thread techniques!--Terry
ReplyDeletePam really is wonderful!! I had another class with her that I'll be describing next post.
DeleteHouston sounds exhausting. Thanks for sharing your classes, I'm amazed at all you've done, off to read your other blog post.
ReplyDeleteThanks
Wendy